How to add a Border to Shape & Image Blocks in Squarespace
Squarespace has made some really amazing improvements to its built-in design capabilities since introducing version 7.1 and the newer Fluid Engine Editor!
For example, one of the smaller, but really powerful, updates that they made was introducing the Shape Block for Fluid Engine. This block has made all of our lives so much easier by providing a code-free way to add fun graphic elements directly to your site.
However, while these new tools are great, sometimes you might still want to add a little extra flare to your design. Maybe you want to add a border to a shape or image to make your page just that little extra dynamic!
The good news is that Squarespace has officially added an automatic border feature to the shape block (woo!!), so there’s no additional custom code necessary if you want to enhance your shapes. The not so good news is that image blocks still don’t have this ability. But don’t worry! We’ve got some easy to follow tips and tricks for you which is why we’re super excited to share this tutorial.
So, keep reading for step-by-step instructions on adding a border to your shapes and some more info on giving your image blocks a border as well (both with custom code and without).
Let’s dive in!

Adding a Border to a Shape Block
Please note that the shape block is only available in Squarespace version 7.1! If you're not sure which version of Squarespace you are using, check out this post.
To get started, you’ll first need to actually add a shape block to your website. To do this, enter Editing Mode and navigate to the section you’d like to add your shape. You can then click on the Add Block button in the top left corner of your section and choose the Shape Block.
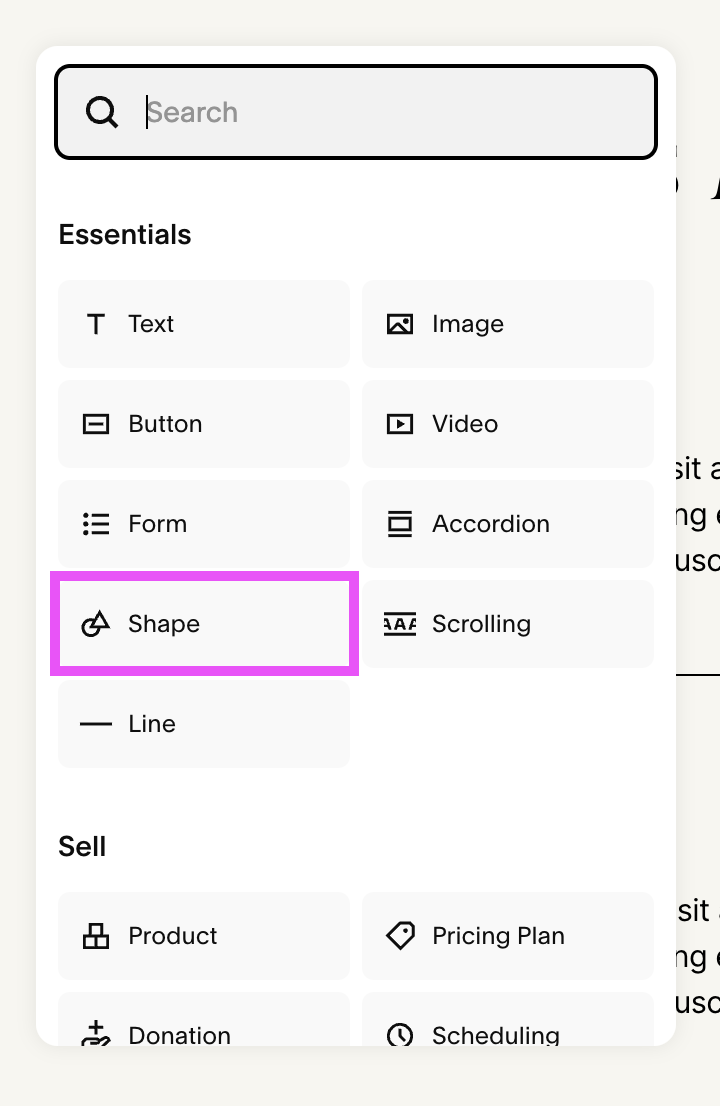
Once you’ve added your shape block and moved it wherever you’d like in the section, double click on the block to open up the Settings window.
Here you’ll be able to choose your desired shape and make other style customizations.

Now, let’s add our border!
In the shape Settings window under “Styling”, you can go ahead and add a stroke, change the stroke color, and adjust the stroke thickness.
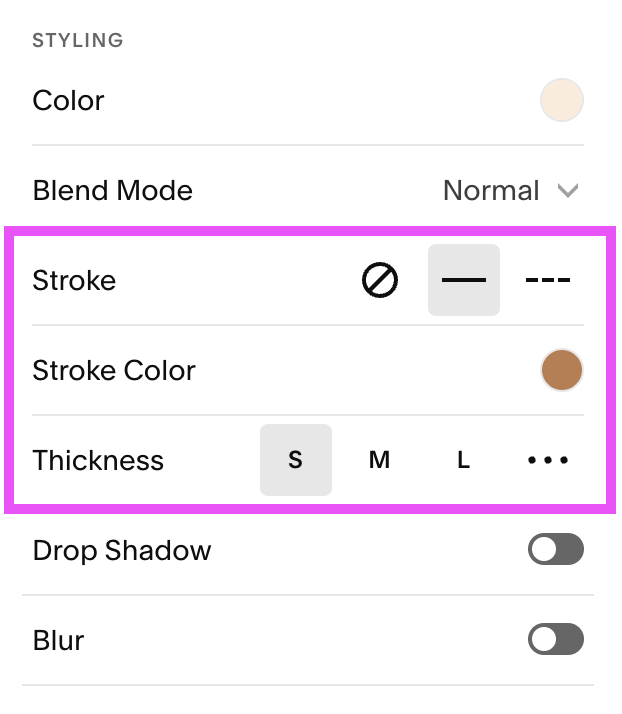
Play around with these settings until you’ve achieved a look you like. Once finished, your shape should end up with a perfectly aesthetic border that looks something like this

And that, you guys, is ALL there is to it. Super easy, right?!
Adding a Border to an Image Block
Now, like I previously mentioned, image blocks in Squarespace do not yet have an automatic border feature like what I showed you above (but hopefully coming soon??).
But that doesn’t mean that your images can’t have beautiful borders! You just need to get creative and put in a tiny bit of extra work by utilizing some copy and paste code or combining a couple of different built-in Squarespace elements.
So, to help you out, let’s walk through two different methods for adding borders to your image blocks.
Add a Border Using Custom CSS
We know that the term “custom css” can be a little scary for some people, but we promise that this method is super easy and will only take you a couple of extra minutes. And the best part is that you can utilize this method in bothSquarespace 7.0 and 7.1!
First, let’s discuss adding a border to ALL image blocks on your website.
Navigate to your Custom CSS Window by clicking the slash key (/) on your keyboard and typing in “Custom CSS”.
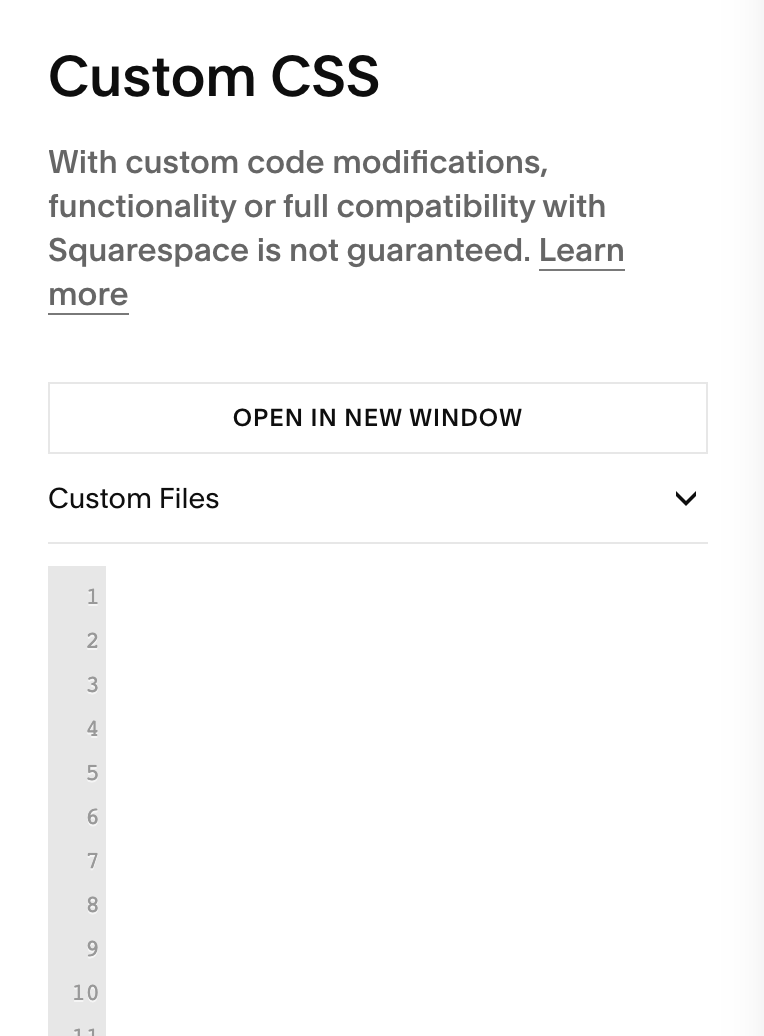
Then, copy the following piece of code and paste it into the CSS window:
.sqs-block-image {
border: solid;
border-width: 4px;
border-color: #000000;
}
You can play around with the values (width, color, etc.) until you have something that you love, and this code is going to add the same border to every single image block on your website.
This is really awesome if you don’t have a ton of images and just want to customize them all in one go. But, as you can see in the example below, sometimes there are image blocks on your site that just don’t need a border!

In this case, there is a way that you can assign the custom code to only specific image blocks using the Squarespace ID Finder Google Chrome extension to target the unique block ID.
To do this, first download and install the Squarespace ID Finder extension to your computer. You’ll need to be using Google Chrome to access this extension, but you should be using Chrome anyway since that’s what Squarespace recommends is best for editing!
Next, head over to your website and navigate to a page and section where there’s an image block that you want to customize.
Click on the Squarespace ID Finder icon in the toolbar at the top of your browser to activate it (you can also click it again to deactivate it).
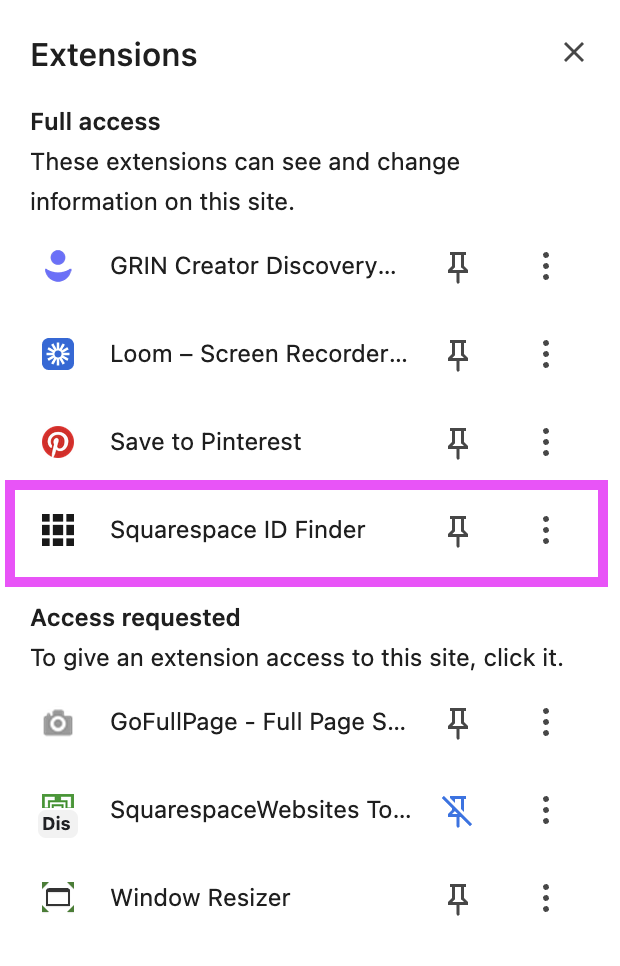
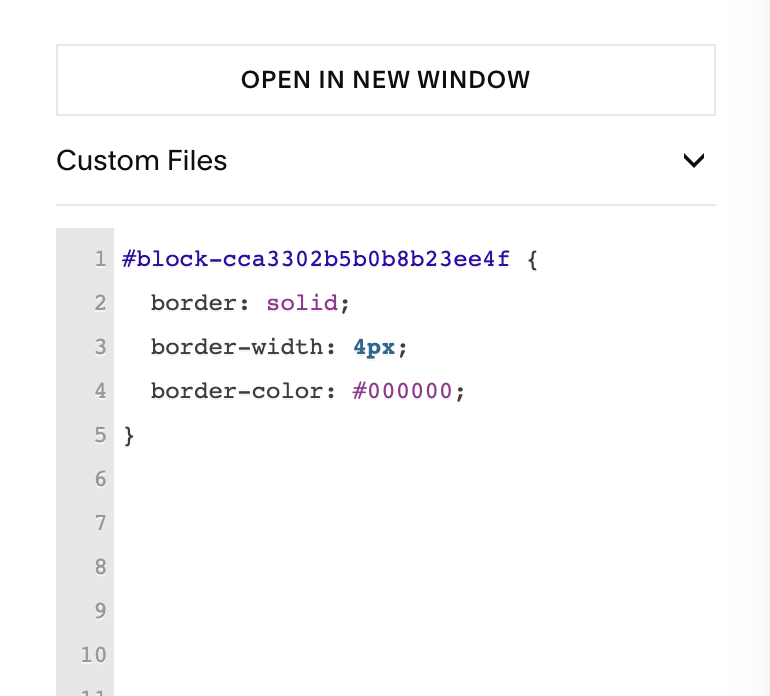
Click on the red block ID that’s directly on top of the image block you’re looking to target. The ID will automatically copy to your clipboard when you click it.

You can then paste that block ID into your CSS window, followed by the same code as before.
Block ID {
  border: solid;
  border-width: 4px;
  border-color: #000000;
}
It should look something like this on your back-end:
Now you can see that ONLY the image block that was targeted has a border.

And again, you can play around with the width and color values to customize things further. In this example, I target a different photo, made the border thicker and changed the color:

Example using our Ava Grand Premium Template

Another image border example from our Michi Premium Squarespace Template
Add a Border Using a Shape Block
The second method we’ll walk you through involves utilizing both the image block and the shape block (this means that it will only work in Squarespace 7.1)!
To use this method, first add your image block, resize it, and get it situated where you want it in the section.
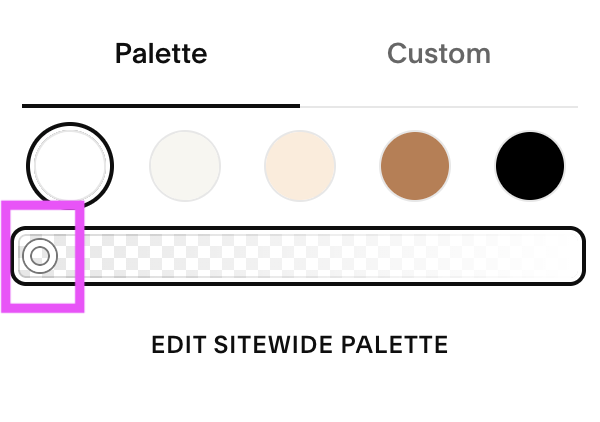
Next, add a shape block on top of your image and resize it to fit over the entire image block.

Double click on the shape block (which should now be covering your entire image) to access the Settings window. Under “Styling”, click on the color circle, choose a color (it doesn't matter which color you choose), and turn the opacity down to zero to make it transparent.
Finally, add a Stroke, choose a Stroke color, and adjust the Stroke thickness.
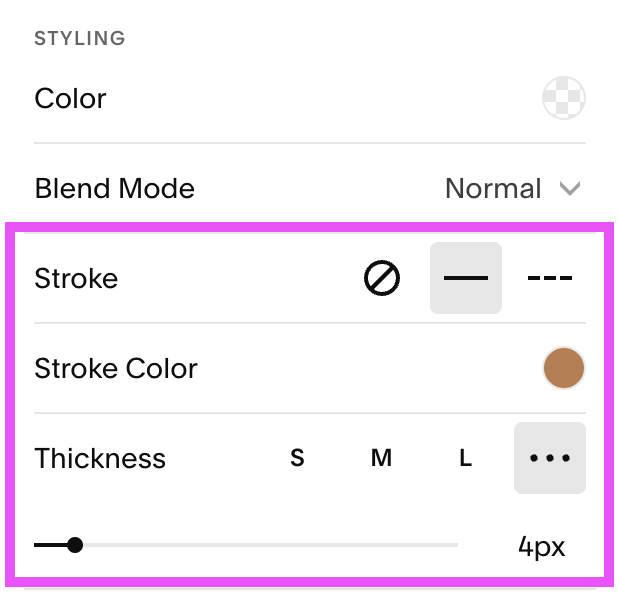
Ultimately, you should end up with a pretty perfect border around your image. No code needed!

Which method you should use is totally up to you. Some people enjoy working with custom css and find it easier to manipulate, and others might want to stick with the built-in tools that Squarespace has to offer. Either way, you have options, and we love that.
And there you have it! All the ways you can add a border to shape and image blocks in Squarespace. Borders are a super easy way to add an extra touch of creativity to your site and might be just the thing to take your design to the next level. Happy bordering!
Want more Squarespace tips? Check out the posts below:
How to Add a Pop-up in Squarespace
How to Change Your Logo Color on Different Colored Backgrounds in Squarespace
How to Upload a Custom Font to Squarespace (7.0 & 7.1)
A Complete Guide to Unique Image Layouts in Squarespace
Where to Find Free Graphics and Icons (and how to use them effectively)
If you liked this post, Pin it to Pinterest! 👇🏻