How to Add a Pop-up in Squarespace
Promotional pop-ups are a great way to automatically promote offers that you know your site visitors will be interested in!
They’re a no fuss, aesthetically pleasing way to ensure that anytime someone visits your website, they’ll be met with enticing information and an easy way to take action. And, luckily, Squarespace makes adding pop-ups super easy, allowing you to use the tool for things like
A freebie opt-in form
A newsletter sign up
Highlighting a new product, post, event or service
Important announcements
Anything else you want to draw attention to
Sounds great, right?! In this post, we’ll walk you through the exact steps you need to take in order to create and customize a pop-up that will wow your website visitors and turn them into loyal members of your community.
Let’s dive in!
What Exactly is a Promotional Pop-Up?
If you’re still not totally sure what a pop-up is, it’s the little box or panel that (you guessed it) pops up when you first land on a website.
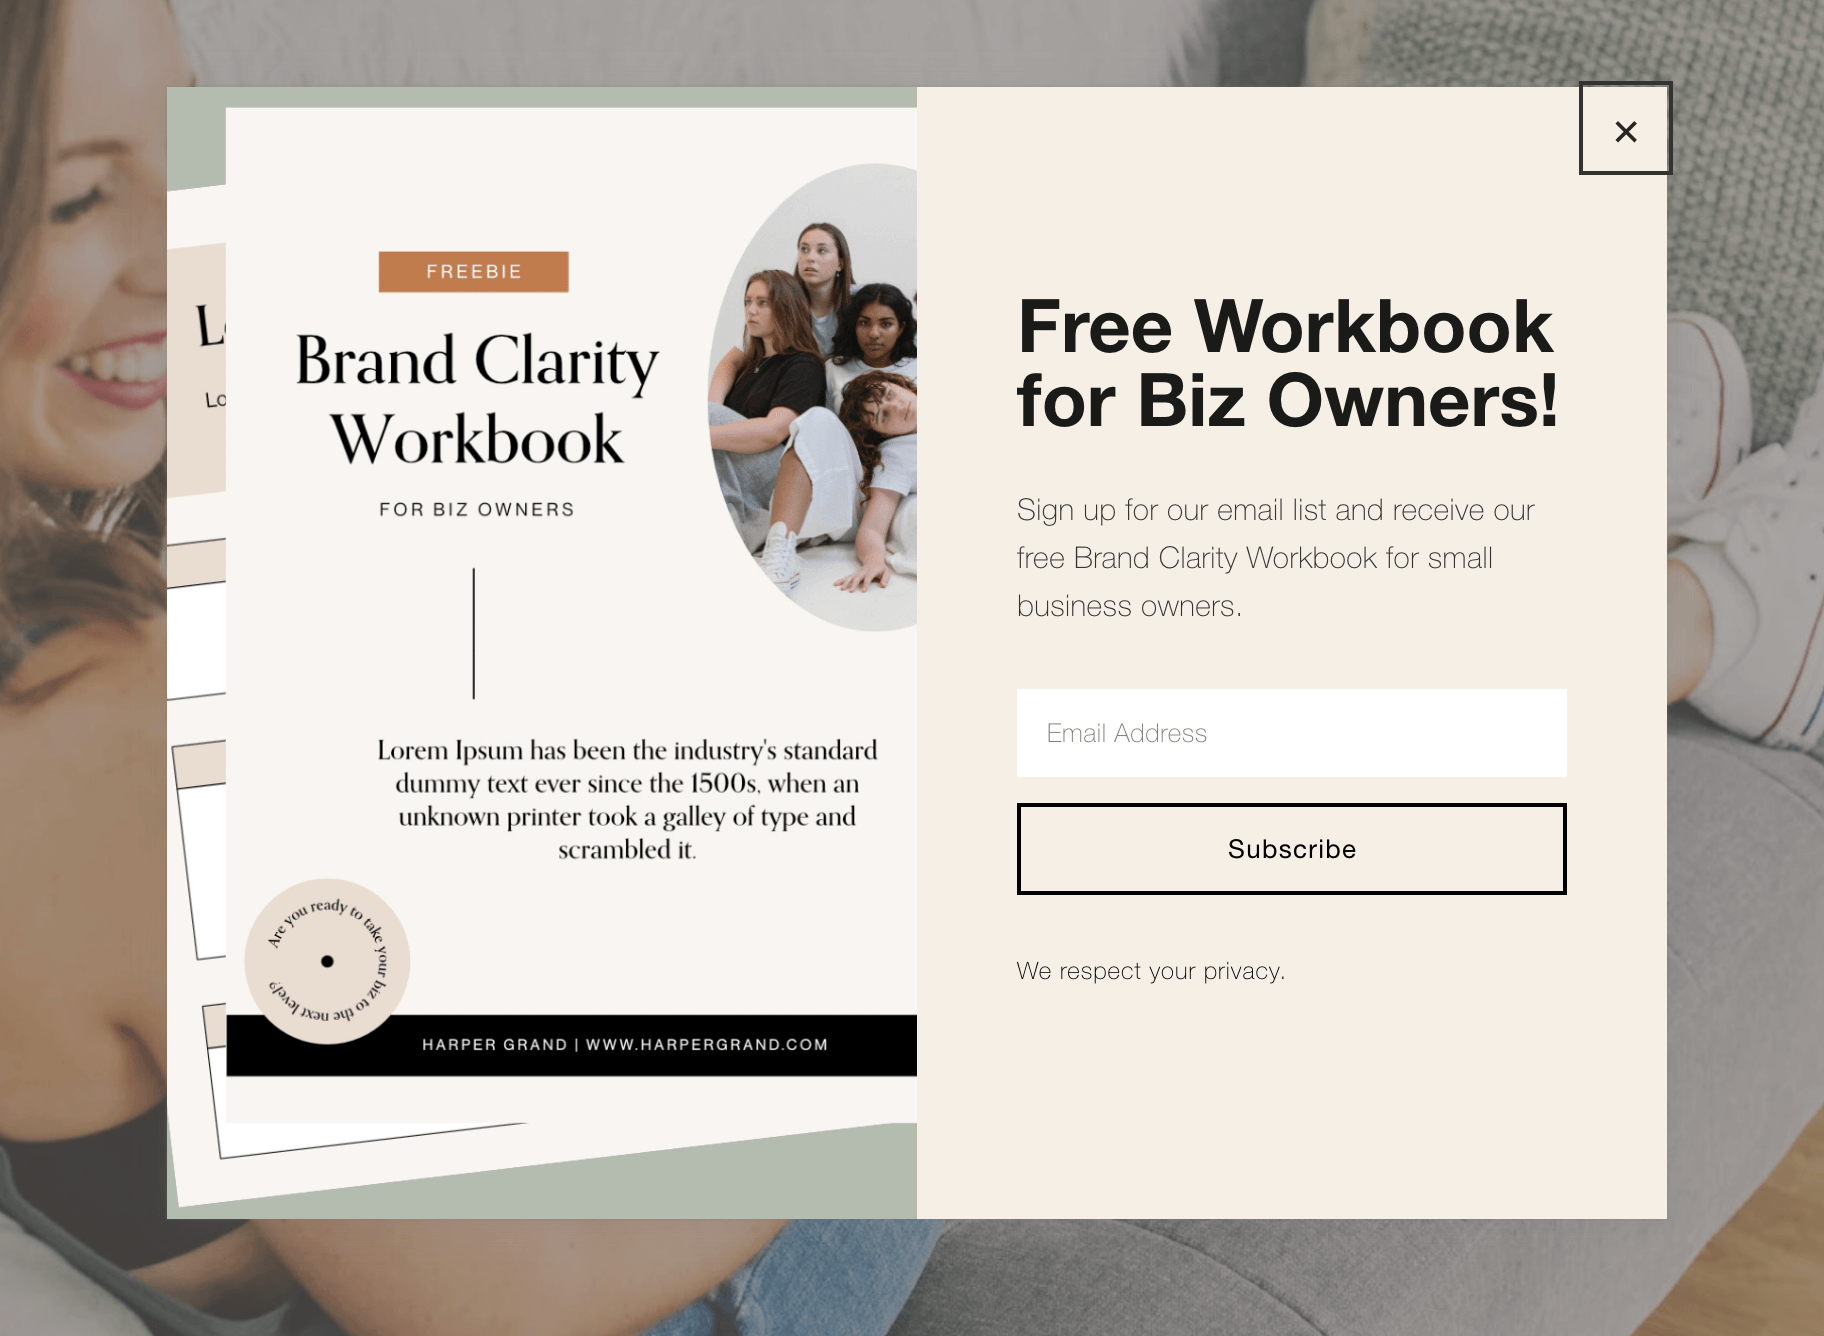
It’s called a promotional pop-up because it’s usually advertising something or trying to get your attention focused on an offer, new product, or special announcement. There’s typically a call to action like a button or sign-up form and there’s always an option to close out of it if you aren't interested.
Now, there’s a good chance that you might have interacted with a website before that drove you crazy with way too many pop-ups. And it’s true, when used haphazardly, pop-ups can be pretty obnoxious (which defeats the purpose of having them in the first place).
But don’t let that deter you! When done well and used strategically, pop-ups don’t have to be annoying and they can actually be a very effective promotional tool!
Important Note: The promotional pop-ups feature is not available on the Squarespace Basic plan. If you are on the Basic plan and don’t want to upgrade, there may be ways to add a pop-up to your Squarespace site using some custom code or an embed code provided by your email marketing platform. This is case by case and largely depends on which email marketing provider you are using. We recommend reaching out to your chosen platform for help or looking into their embed compatibility with Squarespace.
How to Add a Promotional Pop-up in Squarespace
The following steps and features are exactly the same in both Squarespace 7.0 and 7.1 unless otherwise specified!
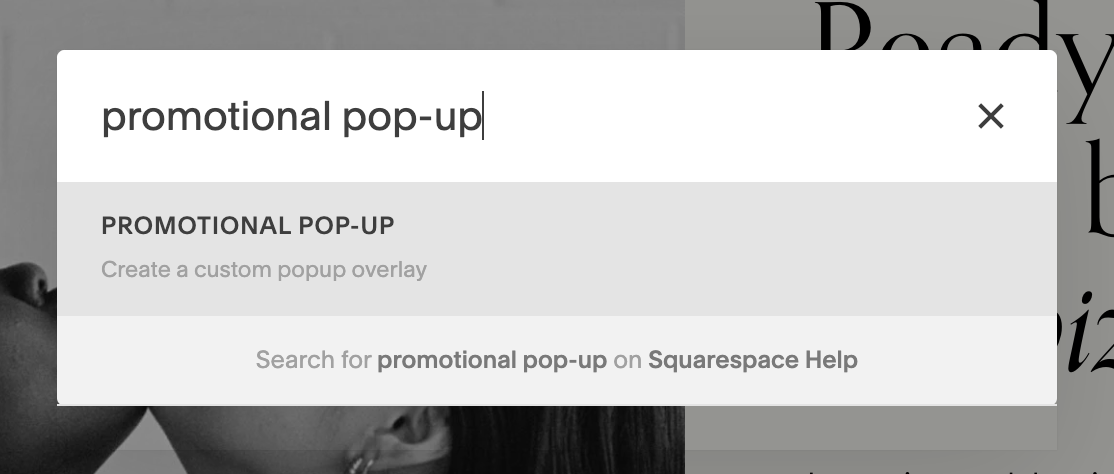
First things first, to access the Promotional Pop-Up panel, make sure that you’re logged into your Squarespace editor. You can then click the slash key (/) on your keyboard and type in “promotional pop-up” to be taken directly to the panel.
Alternatively:
In Squarespace 7.1 you can navigate to Pages > Marketing Tools > Promotional Pop-Up
In Squarespace 7.0 you can navigate to Pages > Website Tools > Promotional Pop-Up
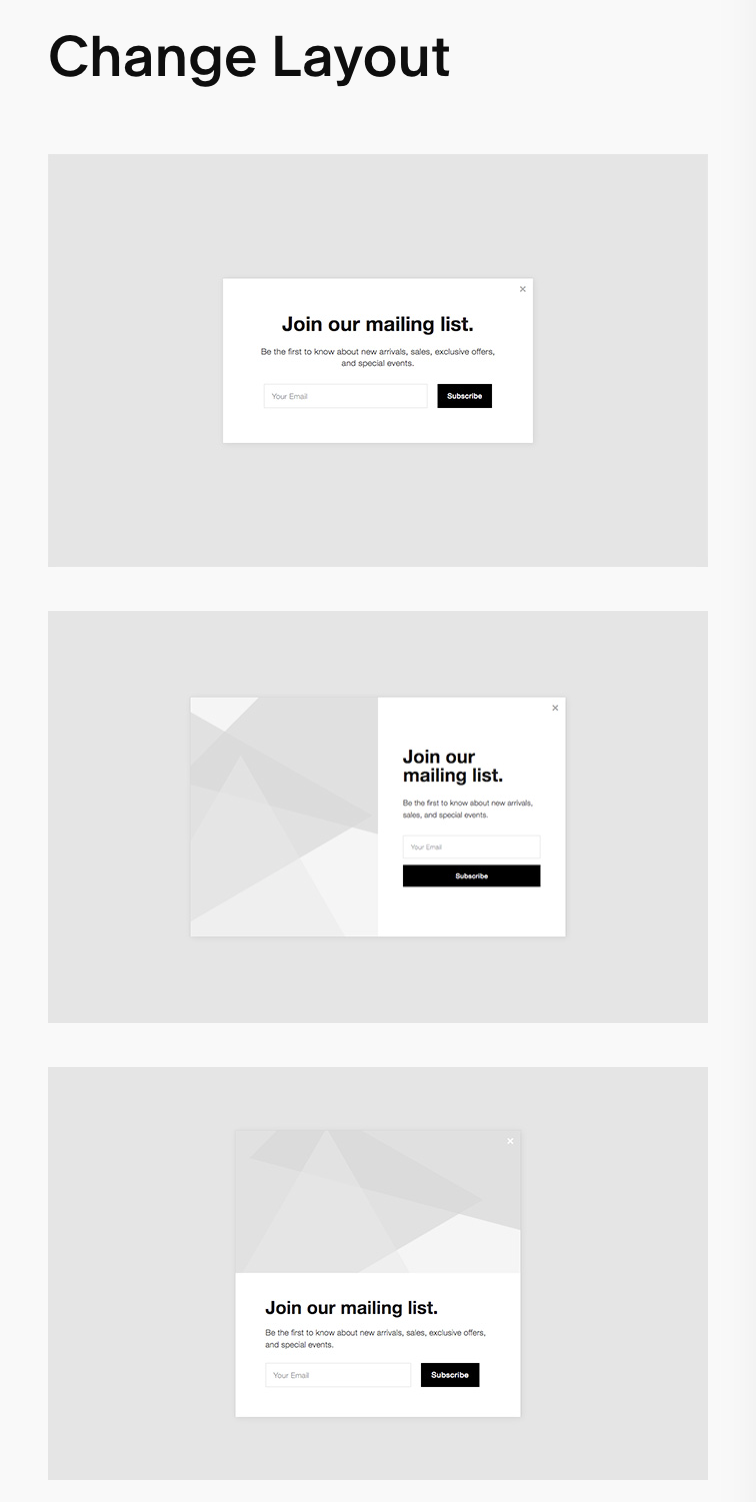
Change the Layout
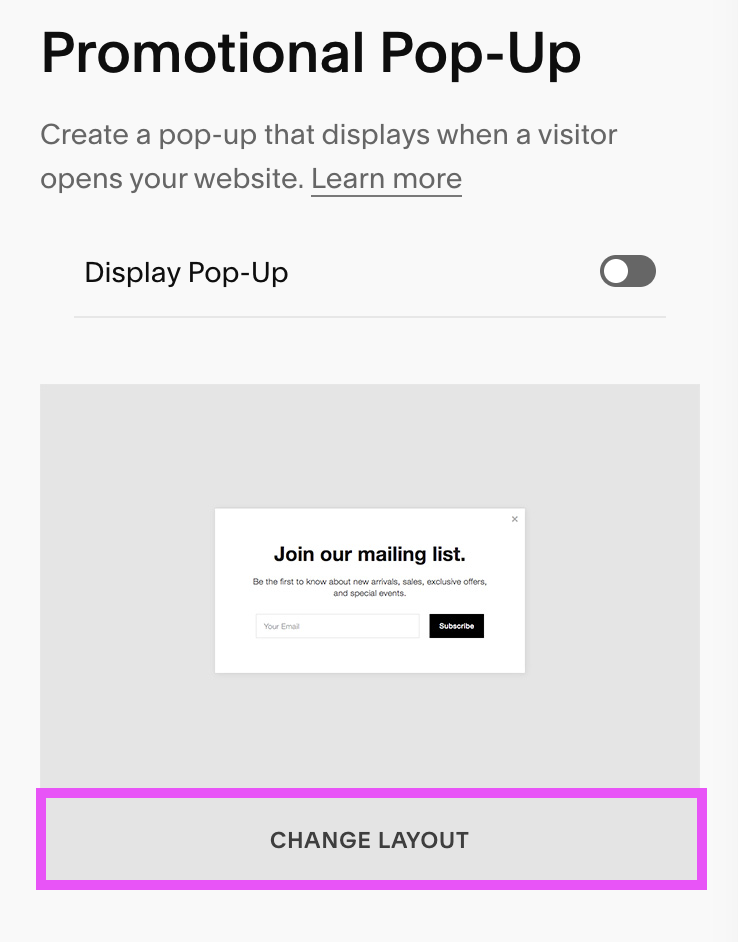
Once you’re in the Promotional Pop-Up panel, the first thing you’ll want to do is choose your pop-up layout!
You can do this by clicking into the Change Layout section at the top of the panel.
Scroll through the list of provided layouts and choose the one that will work best for your offer. Some of the options are text only and some allow you to insert an image, so be sure to click through each one to make sure it’s exactly what you’re looking for.
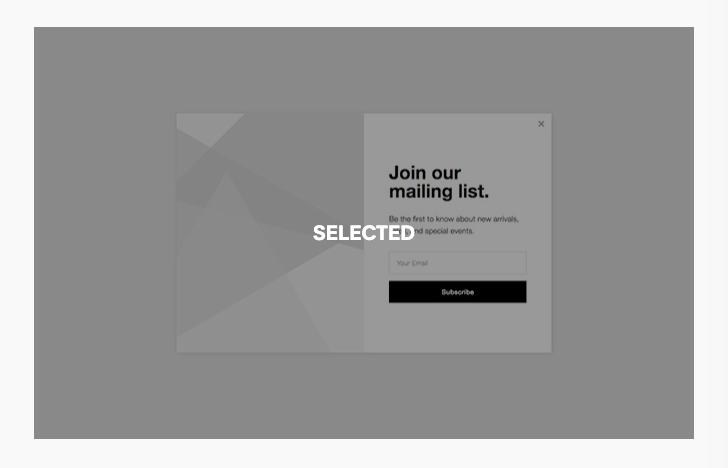
Once you’ve chosen a layout, the preview square will say “Selected”, so you’ll always know which layout you’re using even if you make customizations!
When you’re happy with your layout choice, click Save in the top left corner, head back into the main pop-up panel, and click Save again before moving onto the next step.
Set the Pop-Up Action
After choosing your layout, click into the Action section.
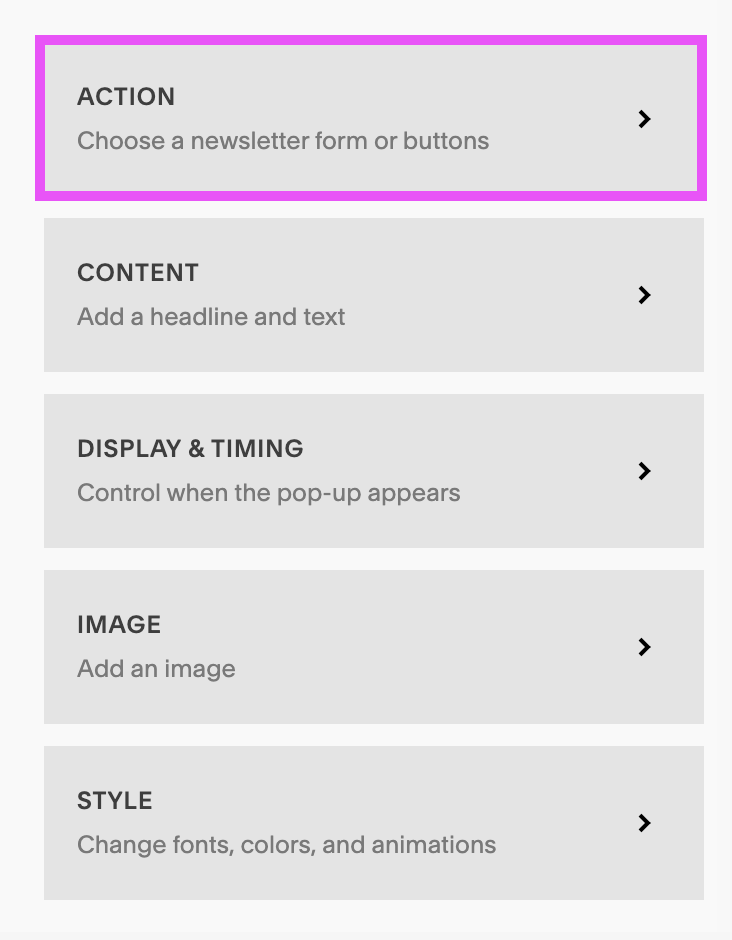
In this panel, you’ll be able to choose the goal of your pop-up! Squarespace gives you two options:
Sign up for a newsletter
Click a button

Option 1: Sign up for a newsletter
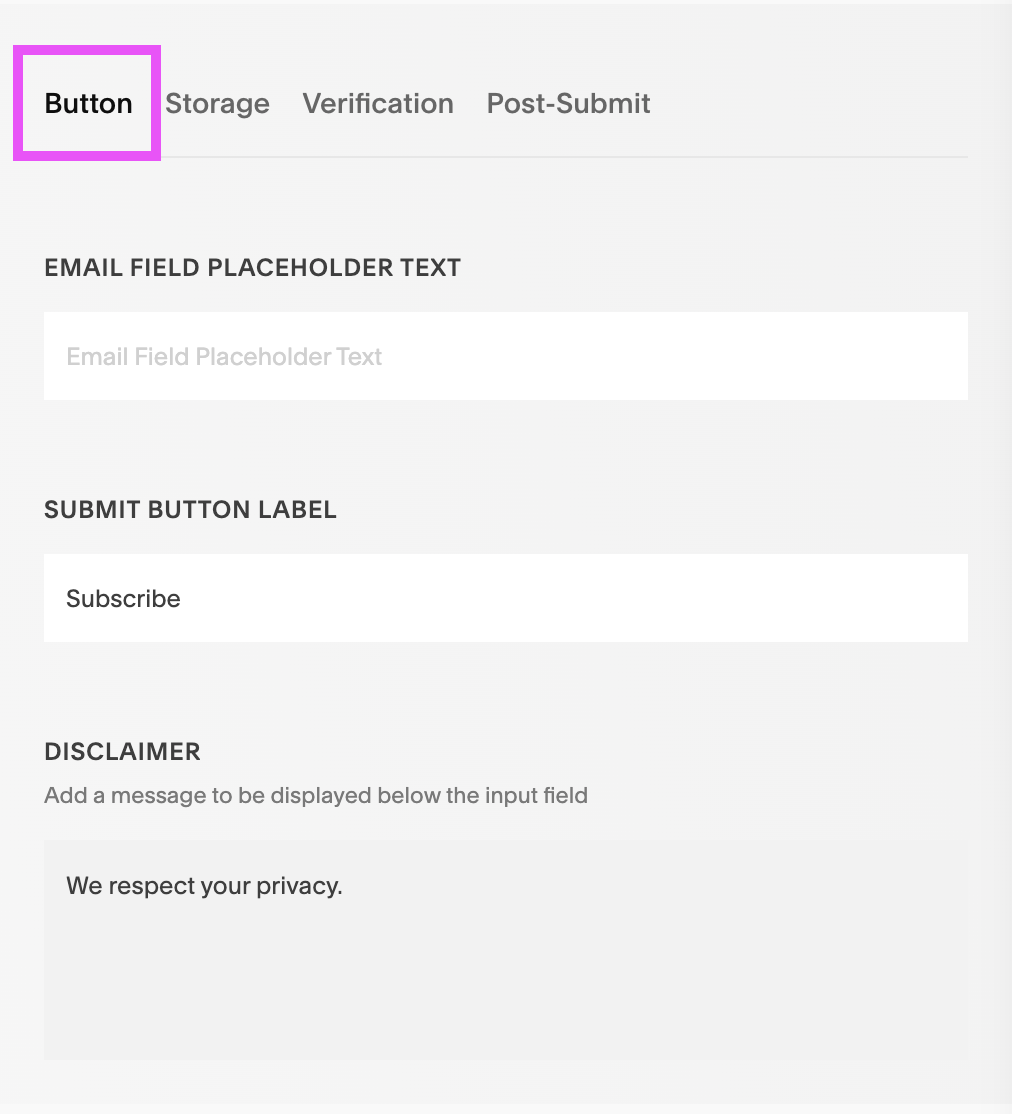
Choosing this option will allow you to add a newsletter block to your pop-up where you can collect emails from your site visitors. When you choose this, you’ll first need to customize the Button tab which includes the
Email Field Placeholder Text: Add some preview text to the email address field. If you leave this blank, it will just say “Email Address”.
Submit Button Label: Customize the text for your submit button. Say something like “Subscribe” or “Sign Me Up”.
Disclaimer: If you’d like to add a disclaimer for your newsletter, this is the place to do it. You can also leave this blank and nothing will show up.
Next, you’ll choose a Storage option. This is where the collected emails will actually go!
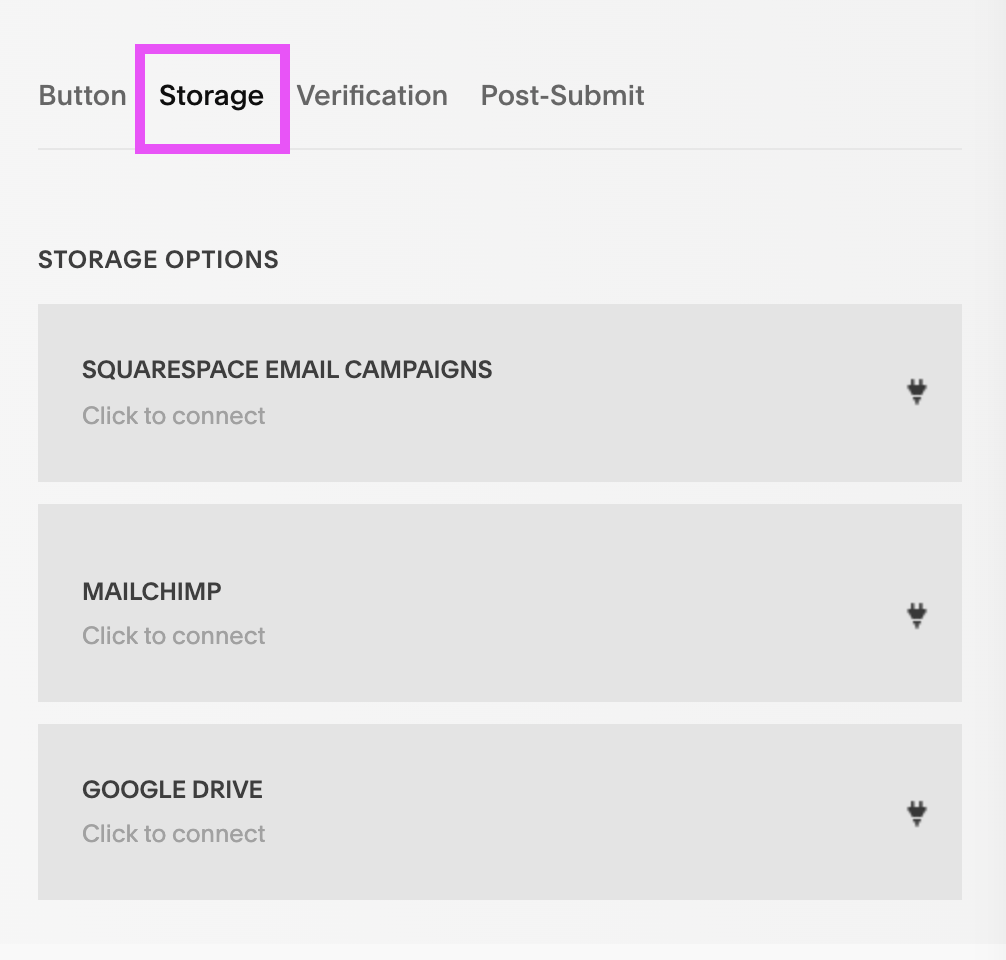
It’s important to note here that you’re only able to directly connect to
Squarespace Email Campaigns
Mailchimp
Google Drive
For Squarespace Email Campaigns and Mailchimp users, this is a super simple connection. All you need to do is click on the one you want to use and follow the prompts to connect.
The Google Drive connection is also great if you just want to save your email addresses to a simple spreadsheet. But, if you’re planning to use the collected emails for email marketing, then this isn’t the best long-term option.
If you are using any other email marketing platform (e.g. Flodesk or Converkit), you have a couple of options for making things work.
Code Injection: Create a pop-up in your platform of choice and then add it into Squarespace using Code Injection. In this case, you wouldn’t be using Squarespace’s promotional pop-up at all. It’s a bit of extra work, but takes out the middle man and allows you to keep everything within your email marketing platform. You’ll need to look into the specific pop-up capabilities of your chosen platform for steps on how to make this happen!
Use Zapier: Zapier is an integration service that allows you to connect platforms that normally don’t connect. With this option, you can choose to store the collected information into Google Drive, then use Zapier to connect it to your preferred email platform!
Use a Button: If you aren’t a fan of either of these options, you might consider using a simple button, which we’ll talk about shortly.
The next step is to decide whether or not you want to add Verification for people who subscribe to your newsletter. You can do this via an email confirmation or Google reCAPTCHA.

And finally, you’ll input a Post Submit message which will show up once someone has submitted their information. Simply add your message to the text field or, if you want to go a bit more advanced, you can add HTML to customize things further.
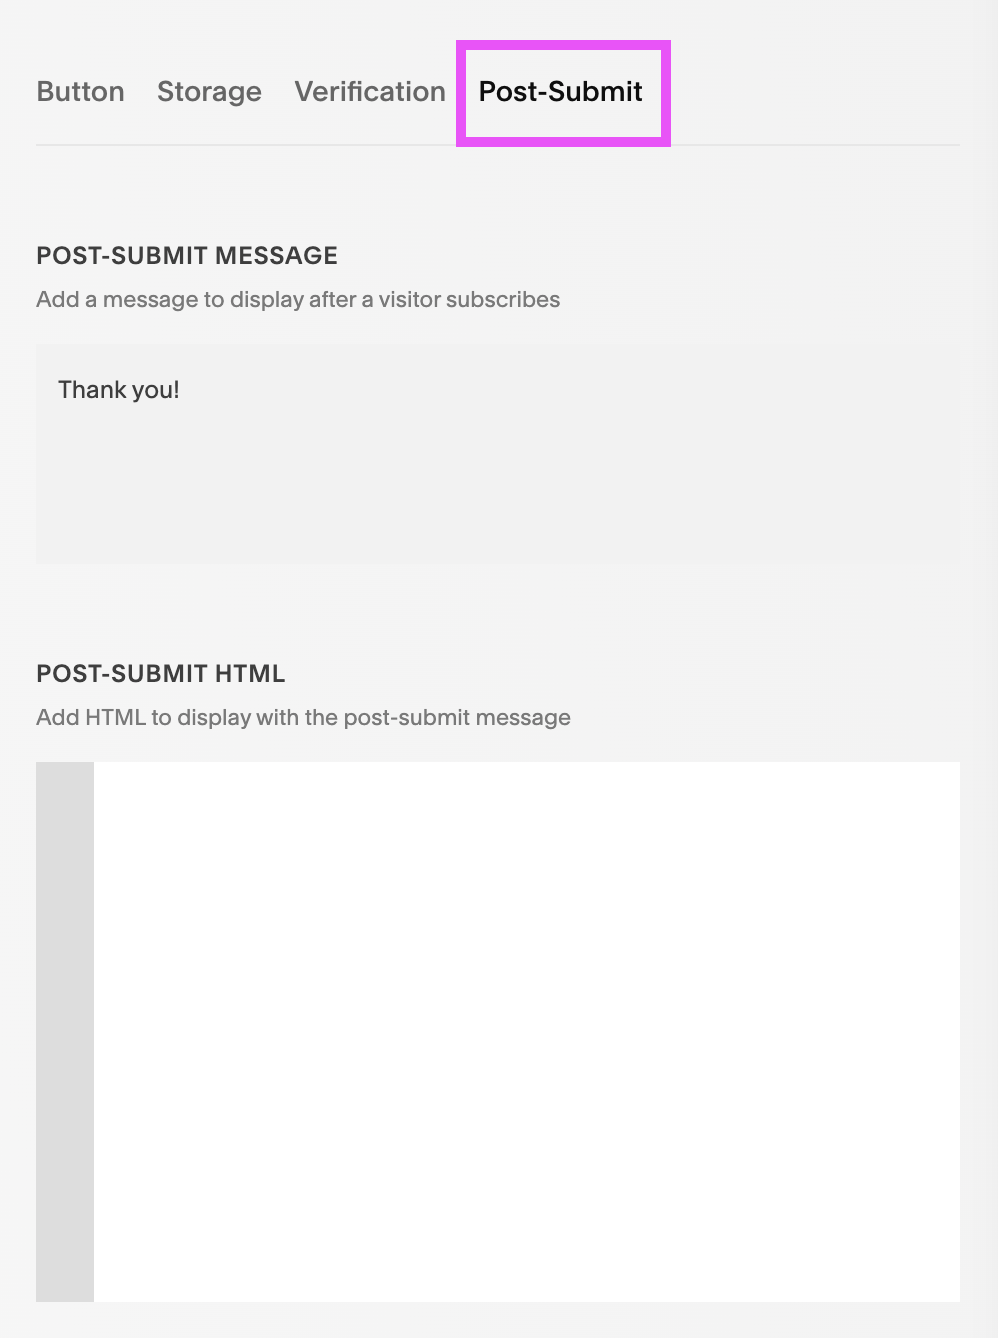
When you’re finished, click Save in the top left corner.
Option 2: Click a button
This option is pretty self-explanatory! You can add up to two buttons within the pop-up and link to either a page on your website, a different web address, an email address, a file or a phone number.
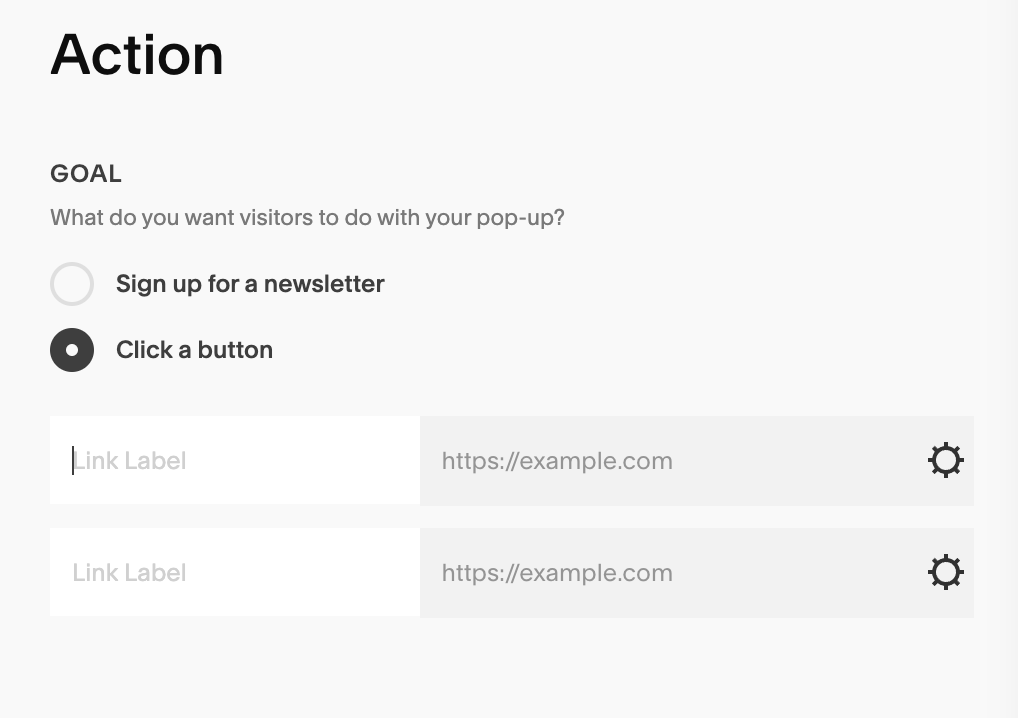
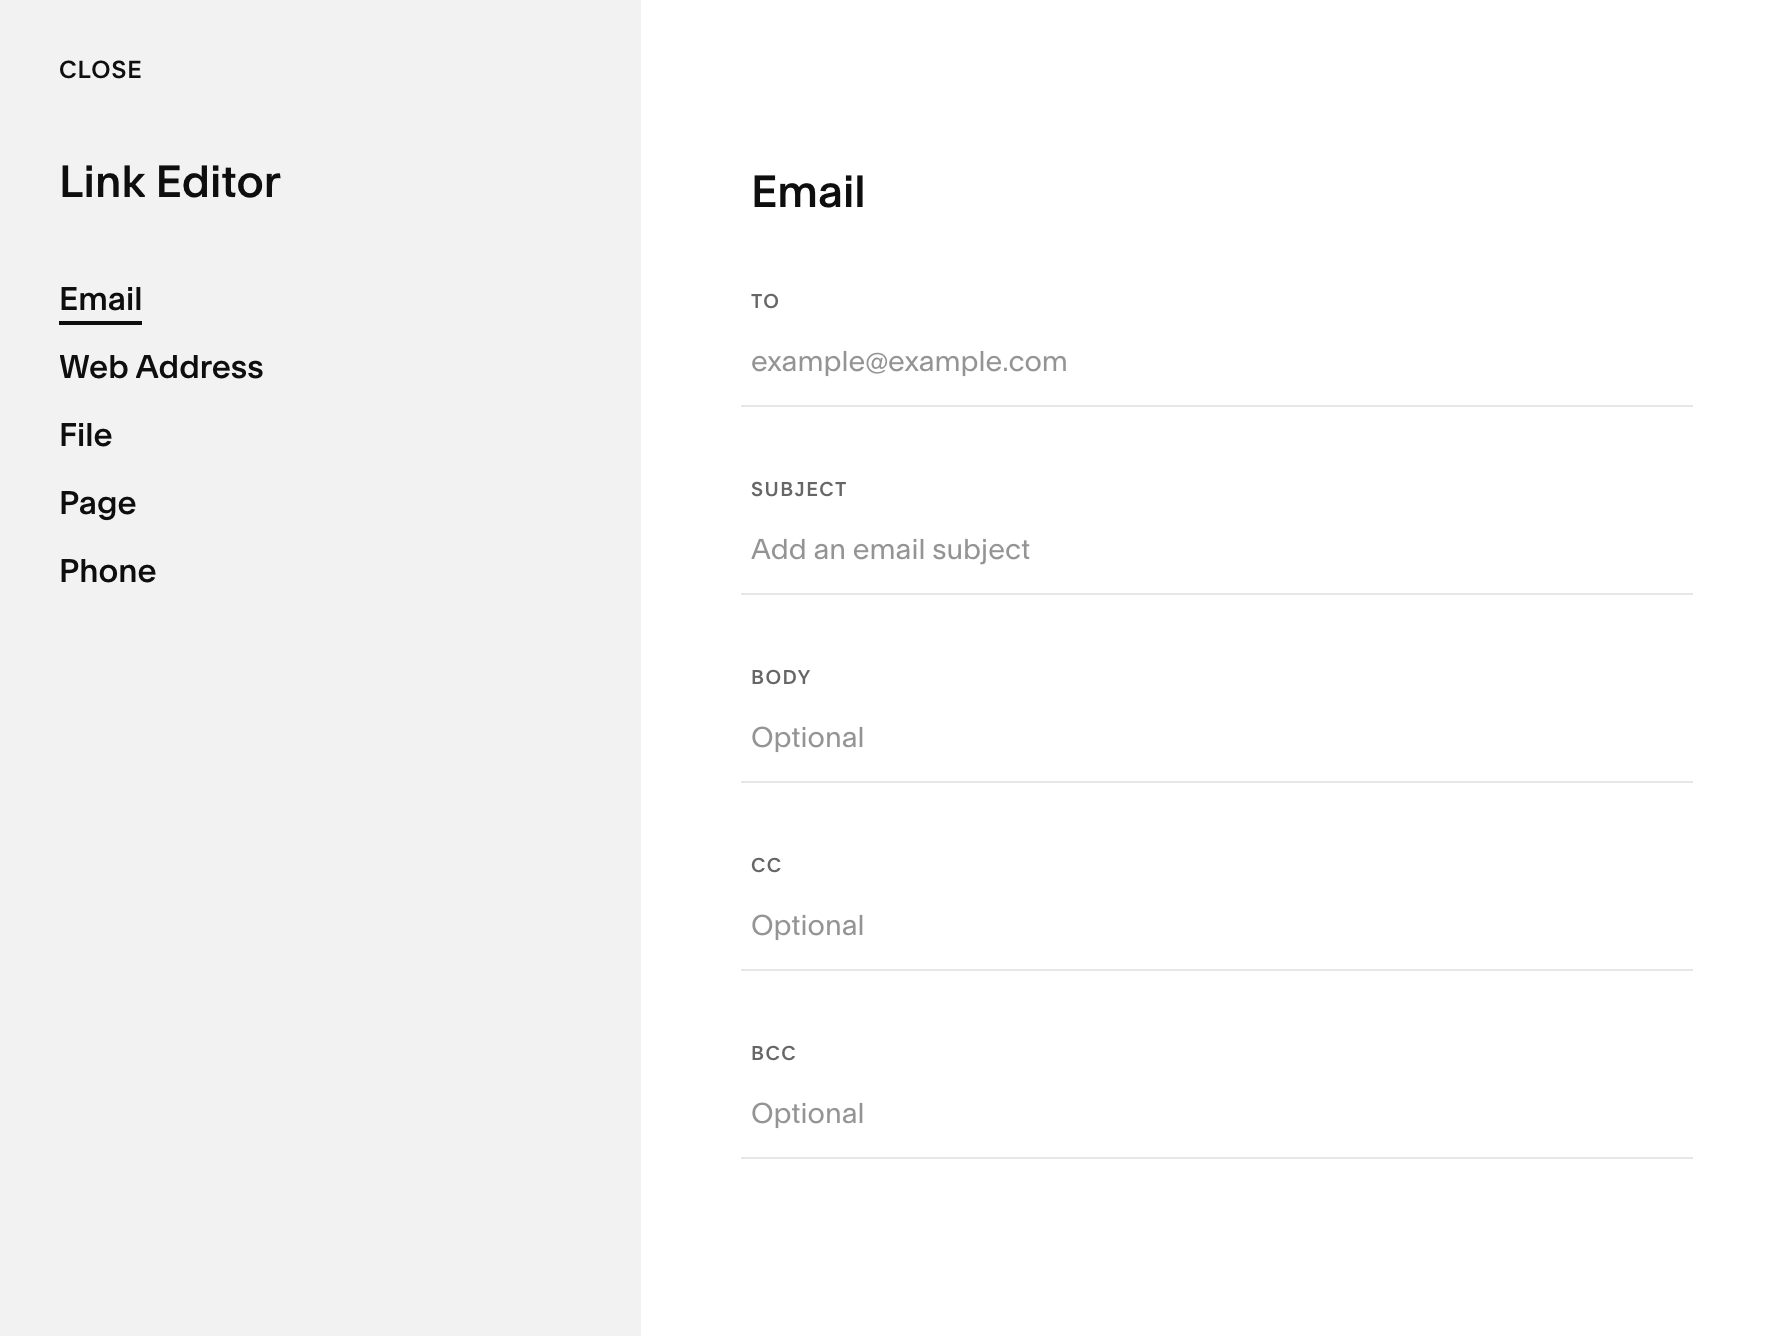
To add a new link. First add your Link Label (aka the button text). You can then click into the Link Field and paste in a URL, or click on the cog icon to open up the full link editor.
If you’d like to use the pop-up to sign people up to your email list, but you can’t use the newsletter block options mentioned above, then we recommend just using this button option and linking out to your newsletter sign-up form!
You could either link
To a page on your website that has your sign-up form
To a landing page that houses your sign-up form (e.g. something like bigcatcreative.com/signup)
This will allow you to take visitors straight to your sign-up form which is a great way to get people opting-in.
When you’re finished adding your button(s), click Save in the top left corner.
Edit the Content
From here, you’ll move onto the Content section.
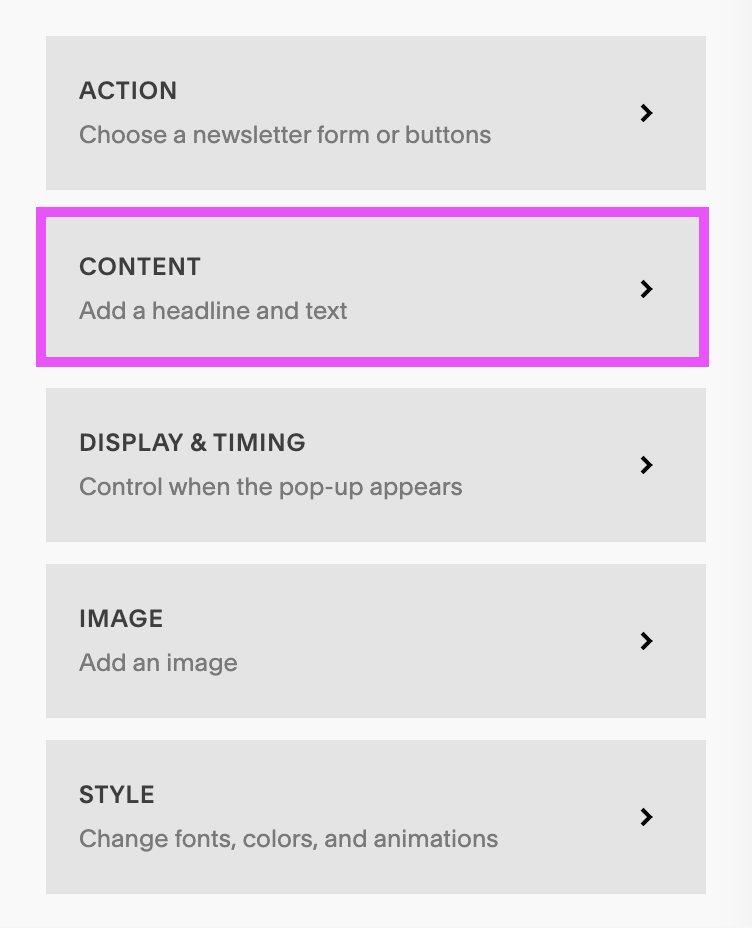
This is simply where you’ll determine your pop-up headline and the body text that you want displayed.
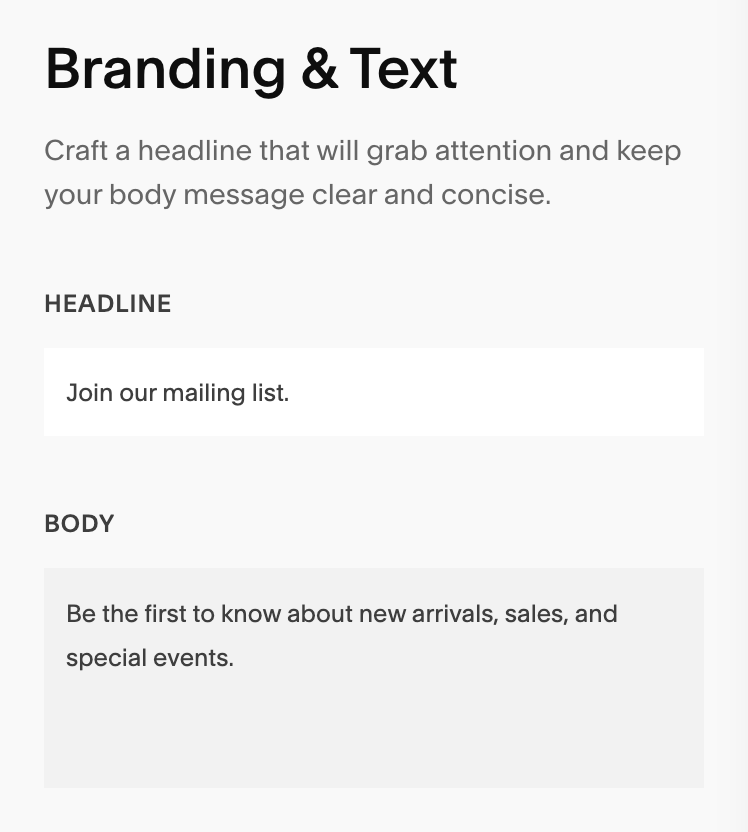
When writing your pop-up headline and text, make sure to keep things short and to the point. Tell your visitor exactly what they’re getting or where they’re going, but remember that you don’t have much time to catch their attention before they close out. If things aren’t clear and concise, you might lose them too quickly!
And, as always, when you’re finished be sure to click Save in the top left corner.
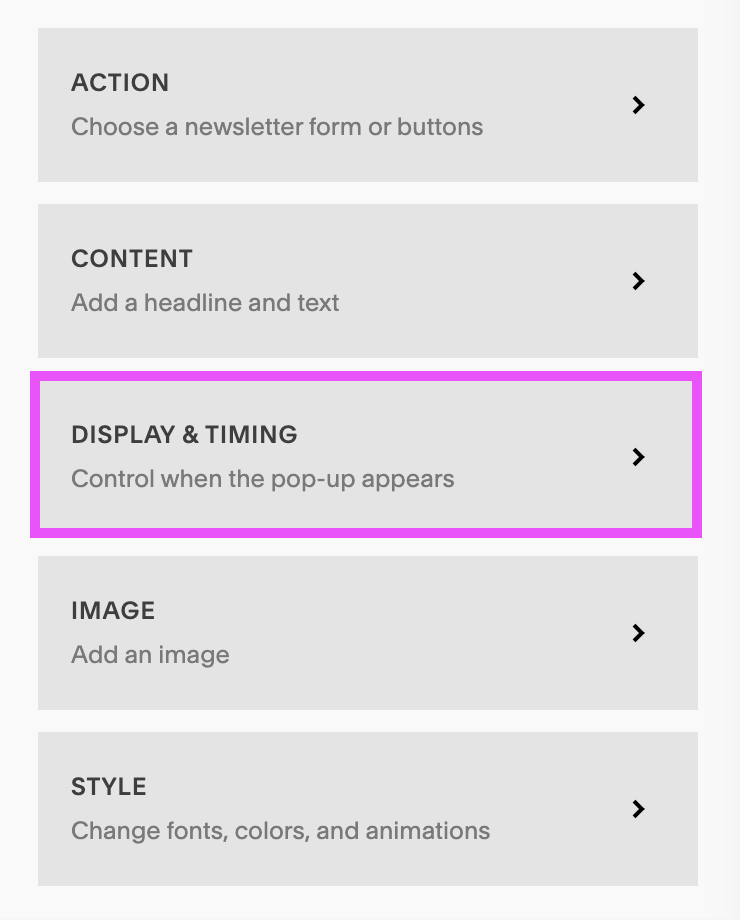
Customize the Display and Timing
In the Display & Timing section, you’ll be able to control when and how frequently the pop-up appears.
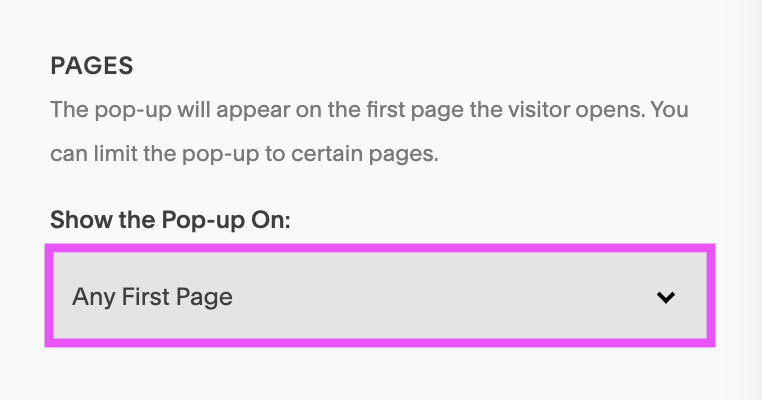
Pages
Under Pages, you can choose to display your pop-up on any “first page” that’s accessed by the visitor, or on only specific pages of your website. Use the dropdown menu to choose whichever option you’d like!
If you choose the “only certain pages” option, you’ll then be able to use a second dropdown menu to choose the pages you’d like the pop-up to appear on.
You are able to select multiple pages here, however, the pop-up will only show up on the first page the visitor accesses out of the specified pages (which helps to avoid being annoying!).

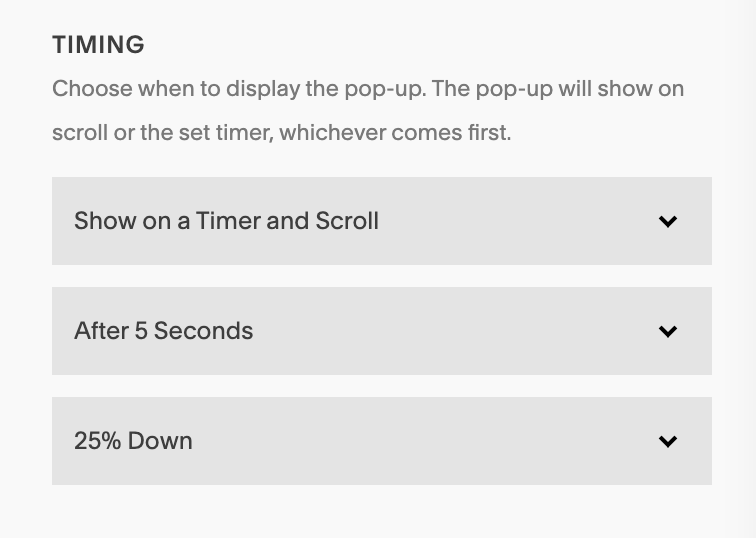
Timing
Here you can choose to show the pop-up on a Timer, on a percentage of Scroll down the page, or a combination of both!
Depending on which one you pick, there will be additional options to set the amount of time in seconds or the scroll percentage.
There’s not really a perfect solution here, but we would generally recommend not showing the pop-up too soon. If the visitor lands on your site and your pop-up shows before they even get a chance to glance at the page they were wanting to see, they will probably immediately close out.
If you give them a chance to view a bit of your content and start reading the page, this might warm them up to be more receptive to the pop-up.
Frequency
The Frequency section allows you to choose what happens after a visitor has already been shown the pop-up once.

In the dropdown menu, you can choose from
The Next Day
In 1 Week
In 2 Weeks
In 30 Days
Never
You can also choose whether or not to show the pop-up again once someone has signed up for your newsletter or whether or not to show the pop-up on Mobile!
This really is totally up to your personal preference and may depend on what you’re offering and what makes the most sense for that.
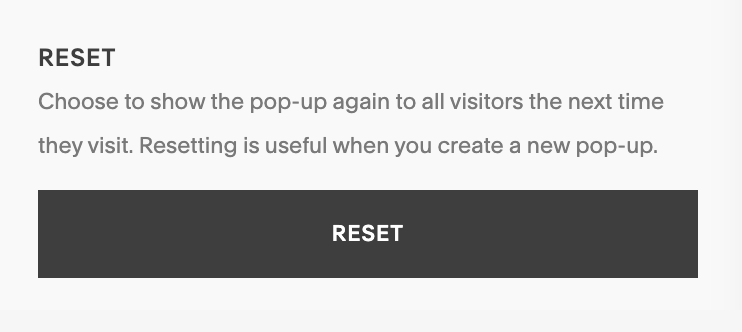
Reset
The Reset option allows you to show the pop-up again to all visitors the next time they come to your site, regardless of whether or not they’ve seen it before. This could be helpful for when you’ve created a new pop-up or if you want to give an extra push to an existing offer.
Once you’re happy with all of your timing and display settings, click Save in the top left corner before exiting!
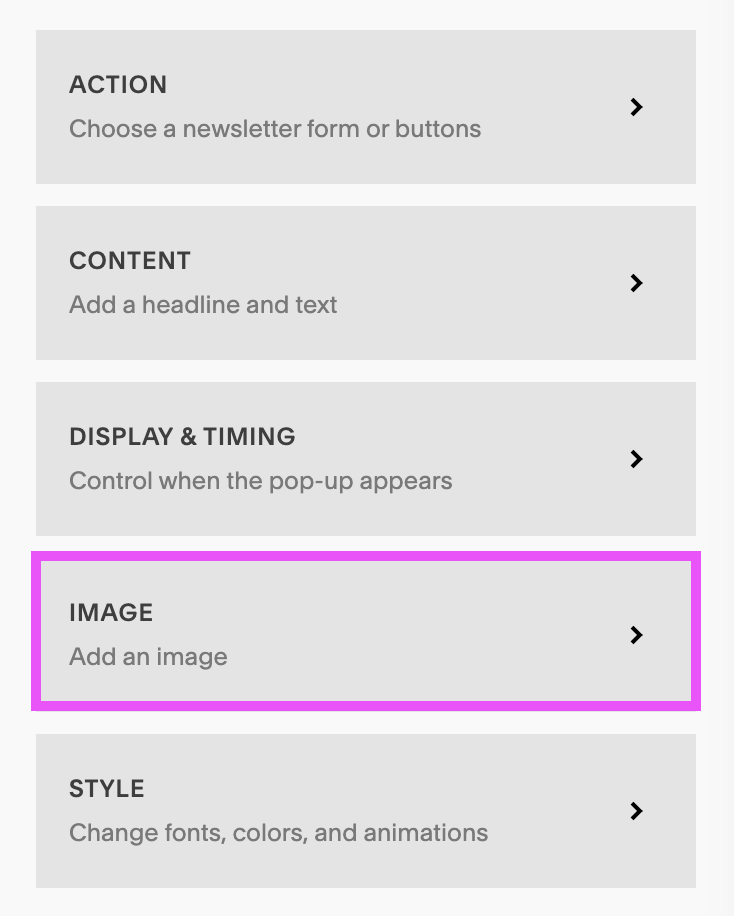
Add Your Image
Next up, you’ll want to head into the Image section (which will only show up for you if you’re using a layout that contains an image).
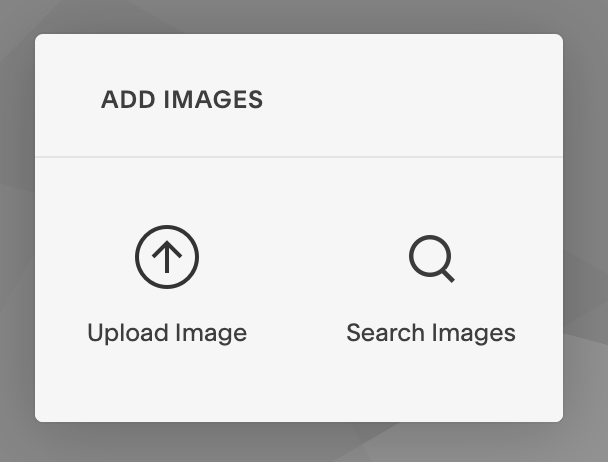
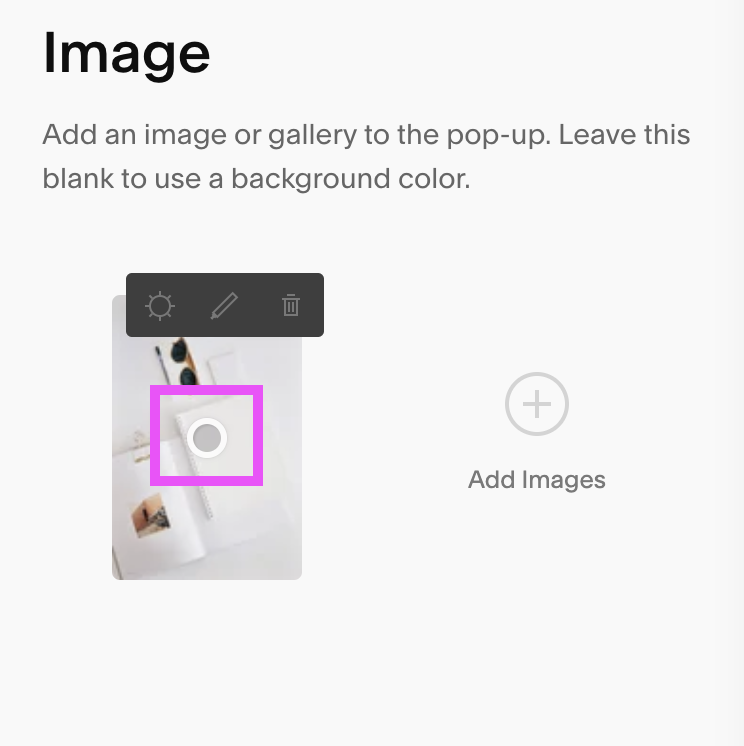
Click into the Add Images area and a smaller window will appear that allows you to either upload a new image from your computer or search from your existing library of images as well as stock images. Super easy!
Squarespace will automatically crop and position your image to fit into the layout you’ve chosen. If you’re not happy with how it looks, you can change the focal point on the image by hovering over the image on the left hand side and dragging the focal point circle around until you’re happy with the positioning.
Some layouts allow you to include multiple images and you can also choose not to upload any image which will instead trigger a background color, so play around with things until you find a visual layout that you’re happy with!
Customize the Style Settings
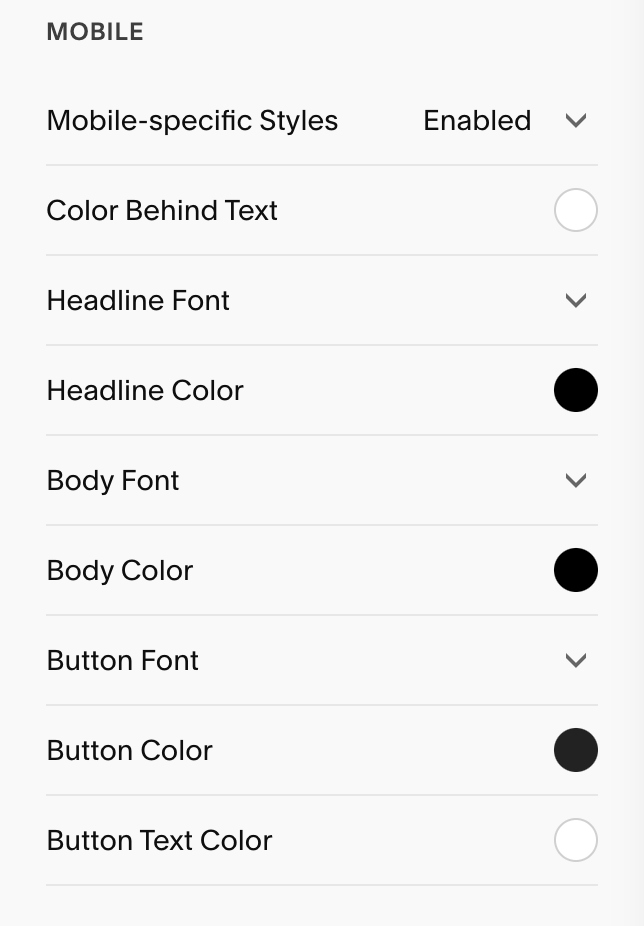
The final thing you’ll be able to customize is the Style section.
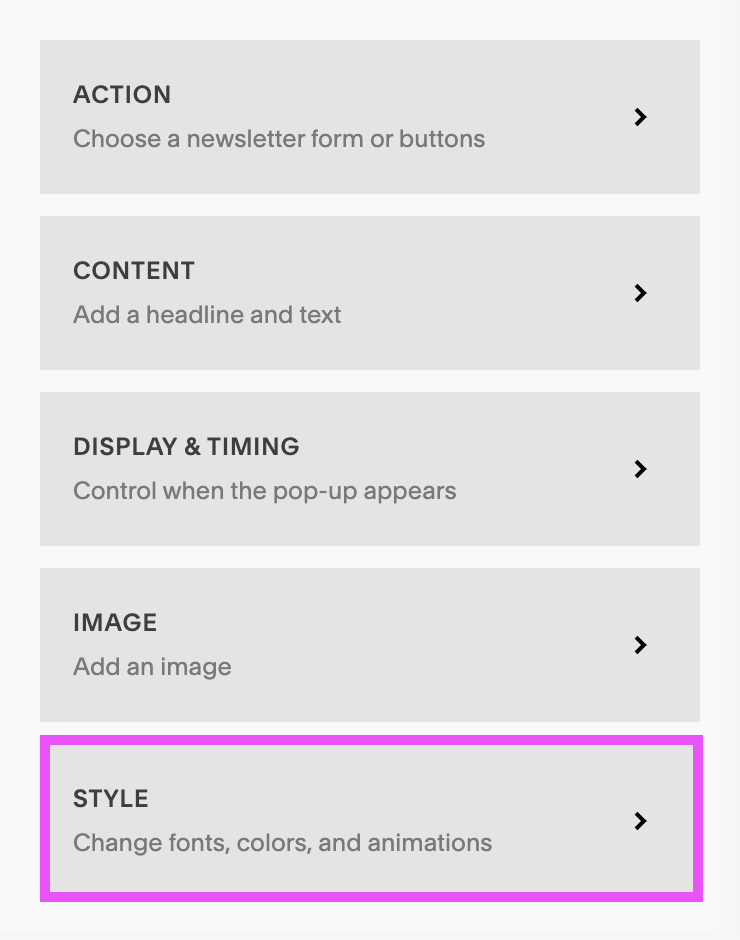
This is where you’ll be able to change all of the style settings like colors, fonts, and mobile design!
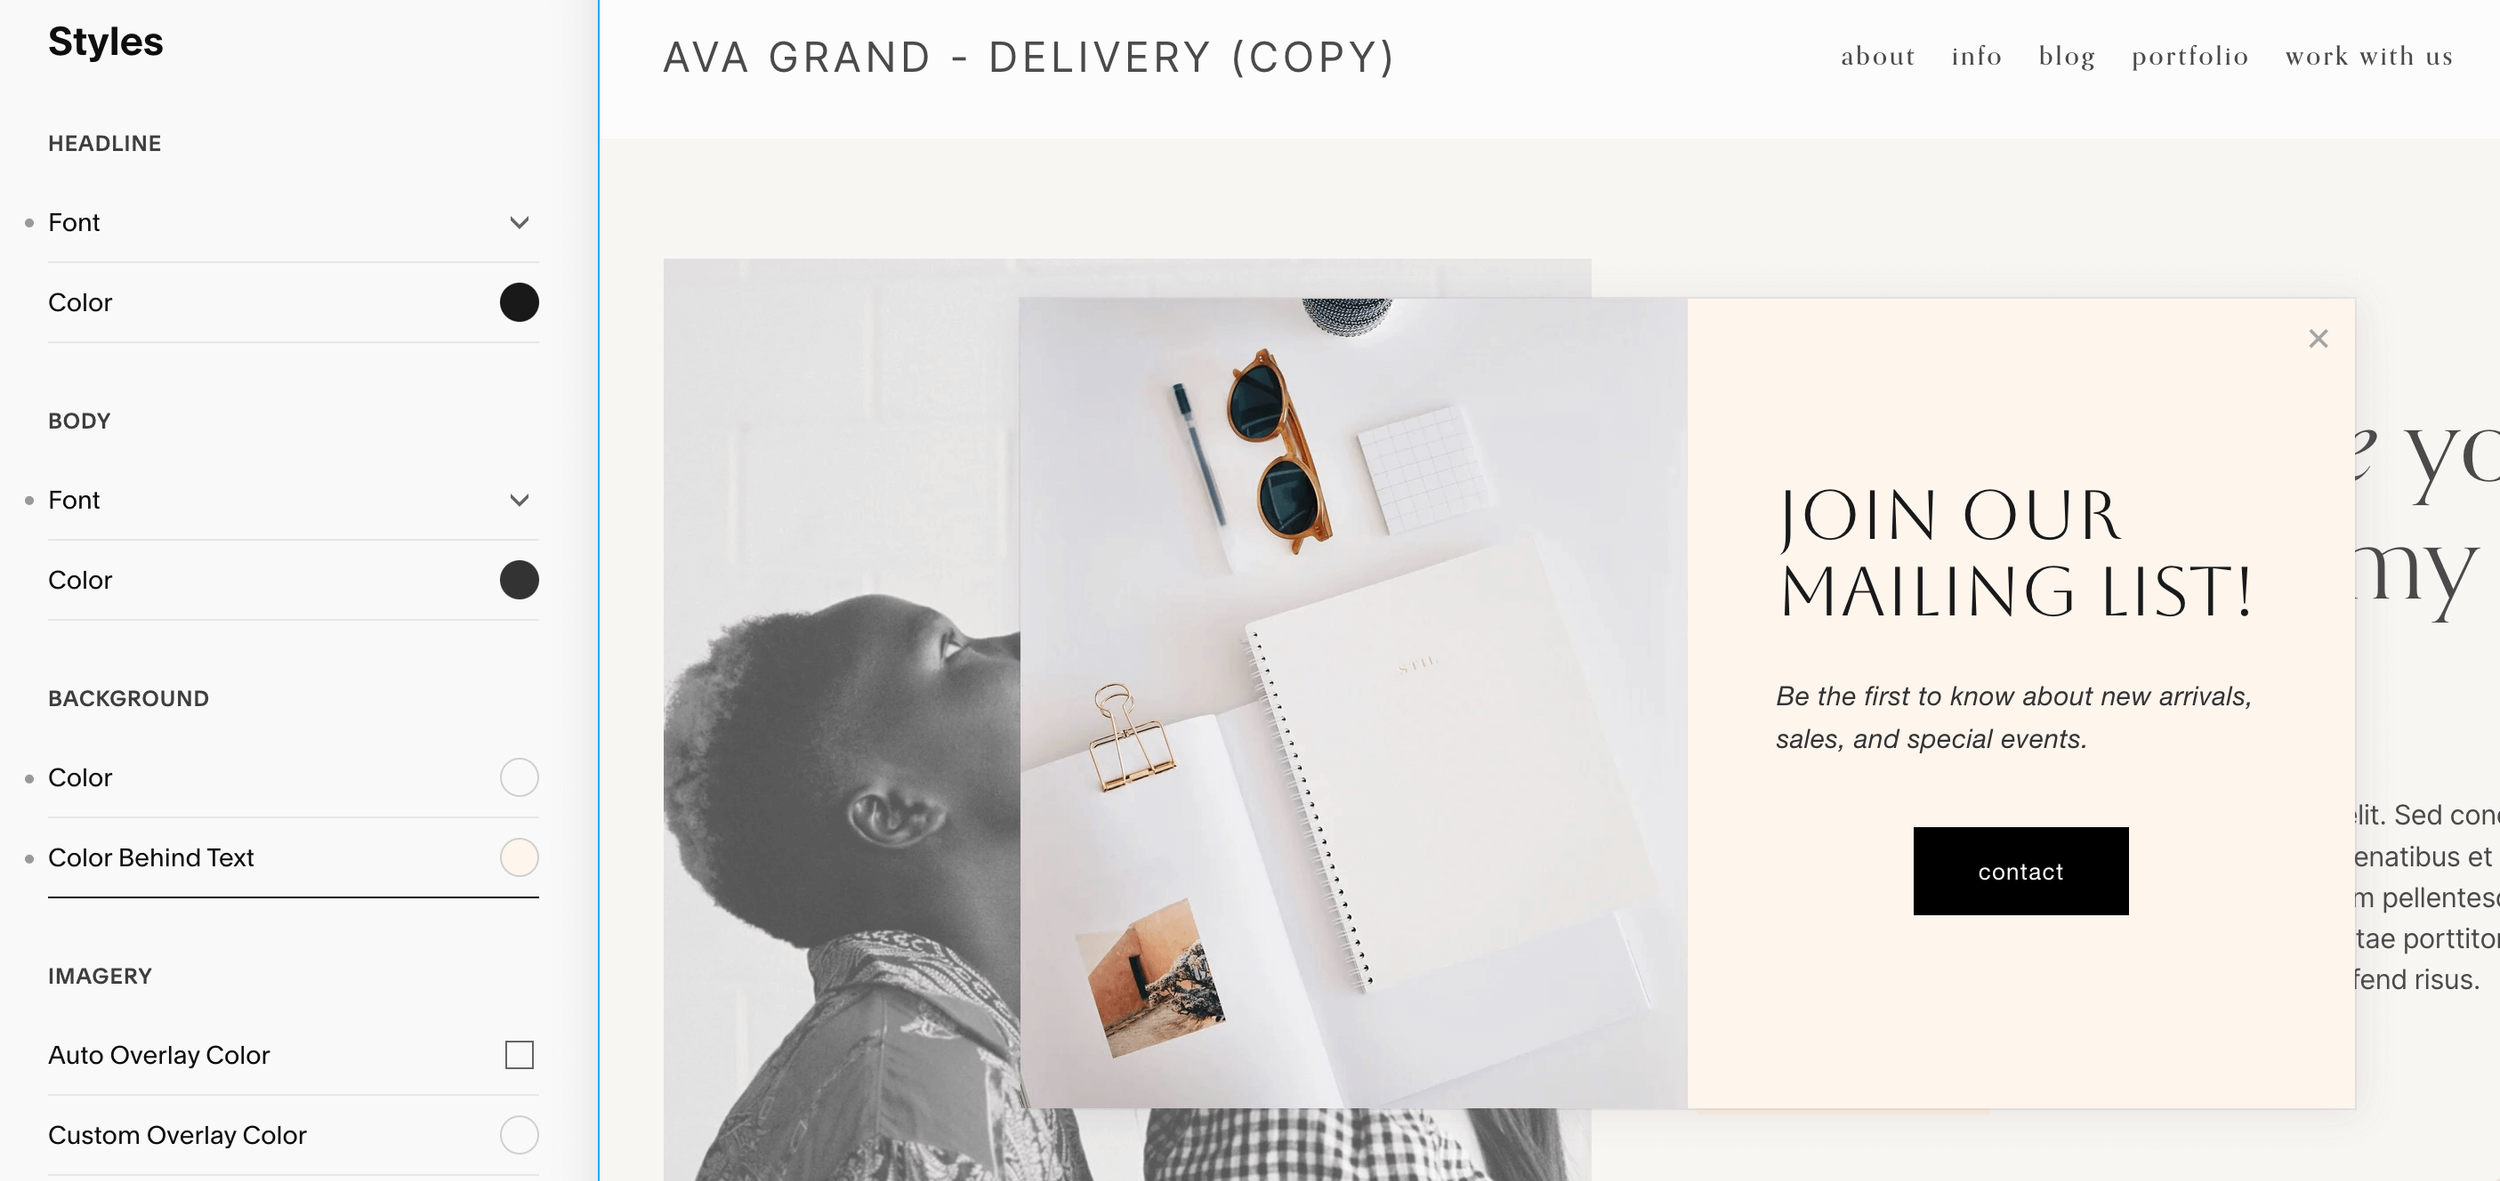
Editing within this Style panel should be very familiar, as it’s essentially the exact same as customizing your website Site Styles. You can work your way down the list and make tweaks until you’re happy with how things look.
Don’t be afraid to experiment with the settings. Everything can always be changed and you won’t do any permanent damage to your Site Styles by making changes here, so get creative! And while you’re working, you’ll be able to preview your pop-up on the right hand side of your screen to make sure everything looks just right.
Note: You may find a couple of small differences between the Style settings in Squarespace 7.1 and 7.0, but the main customization options are all the same!
Advanced Layout Styles
In order to adjust further settings like padding, width, and height, you can enable the Overlay Design settings which you’ll find further down in the Style panel. By nature, these settings are disabled, so you’ll need to click the dropdown menu and choose enabled
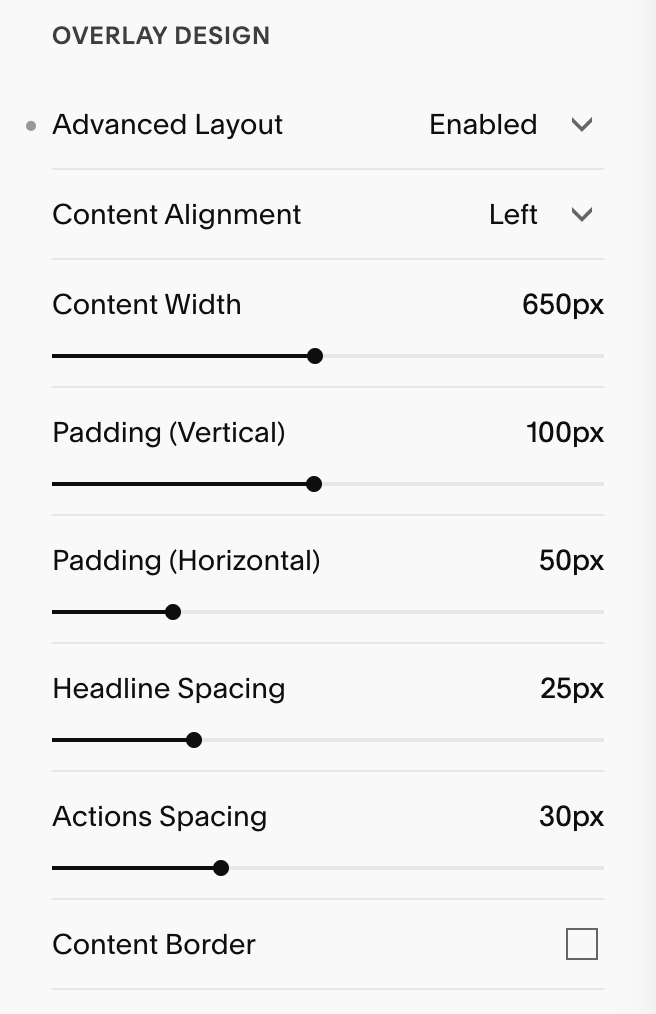
Here, you can change the content alignment, element spacing, add a border, and customize the overall padding.
Again, we recommend experimenting with these settings until you find something that you’re happy with. You’ll never know how things will look until you give it a try!
Mobile Design Styles
If you want to, you’ll also be able to customize the Mobile Design of your pop-up in the Style panel. By nature, the Mobile Design Styles are enabled, but if you want the mobile pop-up to just take on the same settings as desktop, you can go ahead and disable these unique settings via the dropdown.
To view your mobile settings while you’re working on them:
In Squarespace 7.1, click the Mobile View icon in the top right hand corner of your screen.
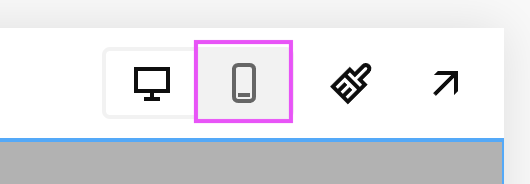
In Squarespace 7.0, click the small line at the very top of your screen which will reveal the Mobile View icon that you can then click on.


You’ll instantly notice that the mobile pop-up looks a lot different from the desktop pop-up! It will likely look similar to this before it’s been customized:
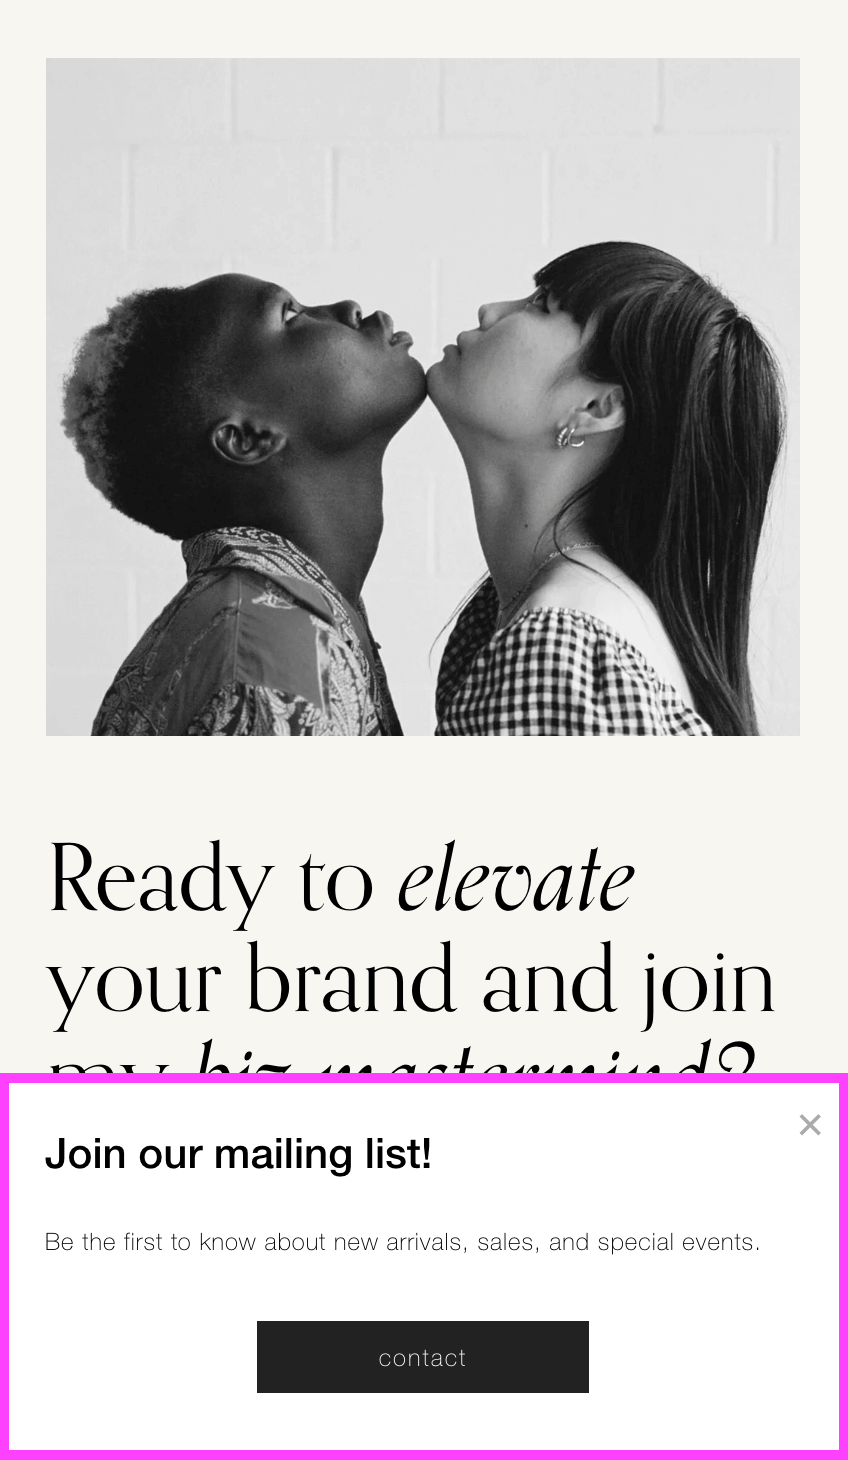
Most notably, it doesn’t have an image and it’s at the bottom of the screen. Squarespace does this intentionally and considers best practices when designing for mobile view. It’s important that the pop-up is smaller and unobtrusive on mobile, and easy to exit out of, as to not lose site visitors.
If you really hate the mobile design of the pop-up, you could try changing it with some Custom CSS, but we highly recommend leaving it as is for the above reasons!
And like all other sections, when you’re finished making adjustments, click Save in the top left corner to lock in your customizations.
Display Your Pop-Up
The very last (but most important) step is to actually make your new pop-up LIVE!
You can do this by toggling on the Display Pop-Up option at the very top of the Promotional Pop-Up panel.

And once you’ve done this, you’ve got yourself a beautiful and functional promotional pop-up on your Squarespace website!
Hopefully this tutorial was helpful and got you thinking of all the ways you can use a pop-up on your site.
Want more Squarespace tutorials? Check out the posts below!
How & Why you Should Create a Custom “404 Not Found” Page in Squarespace
How to Deliver an Opt-In Freebie Instantly in Squarespace
How to Upload a Custom Font to Squarespace (7.0 & 7.1)
The Best Linktree Alternative: How to Create a Custom Link in Bio Page on Squarespace
How to Customize Squarespace Forms (and Say Goodbye to Boring Contact Forms)
If you liked this post, Pin it to Pinterest! 👇🏻