

How to add an Email Sign-up Form to your Squarespace Website
Starting with email marketing can be pretty overwhelming. There are many different steps to consider and strategies to form, however, gathering subscribers should be the thing that brings you the least amount of stress.
Enter Squarespace (always saving the day)! Thankfully, once you’ve done a bit of work on the front end, Squarespace makes it super easy to add an email sign-up form to your website so that you can conveniently gather addresses and grow your community.
In this post, we’re going to break down what you need to do before adding your sign-up form and how you can quickly add and style one on your site when you’re ready.
Let’s dive in!

What is an Email Sign-up Form?
First things first, let’s get clear on one thing - what exactly IS an email sign-up form and what is it used for?
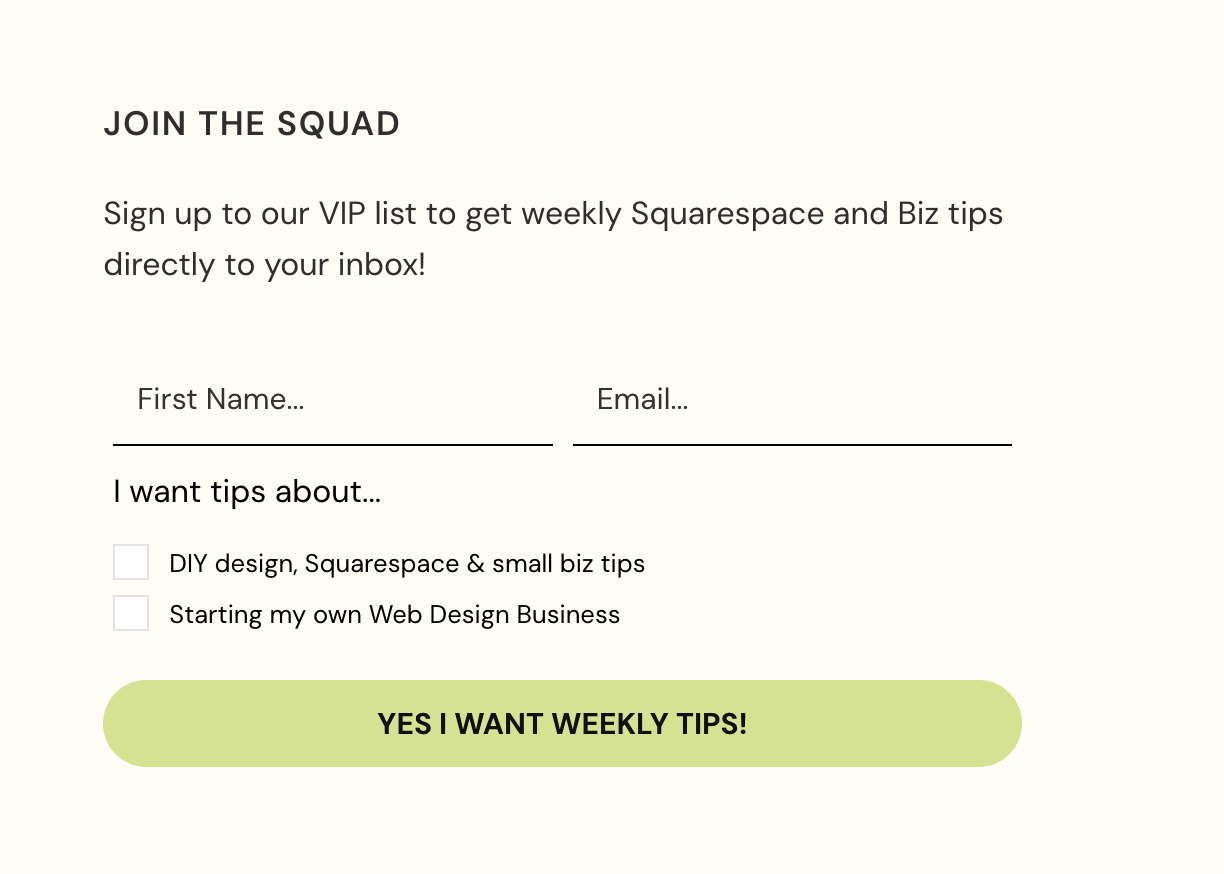
An email sign-up form (also sometimes referred to as an opt-in or newsletter form) is a way to capture email addresses from potential clients/customers. It typically comes with a little blurb about what to expect when subscribing or signing up for a freebie, a few fields to enter your name and email, and a “sign-up” button.
You’ve probably seen these forms on almost every website you’ve visited!

The truth is, around 96% of people who land on a website are not yet ready to buy or commit to anything during that first visit. Because of this, they will likely browse for a moment and then leave, potentially completely forgetting about your business and products. BUT, if you snag their email address before they click away, you can market to them via email and make sure that you stay top of mind for them.
This is why email sign-up forms are so incredibly helpful. In fact, email marketing in general is one of the most effective marketing channels. And if you still need a little convincing, take a look at our post on why you need an email list.
So now you know, email sign-up forms are super handy and really are like the cherry on top of your email marketing strategy. Now, let’s get into the how-to’s of implementing everything on your website.
👉 How to get started with email marketing: a simple guide for beginners
How to set up an Email Marketing Strategy
Before you can actually add a sign-up form to your website, you’ll first need to iron out your email marketing strategy and get things settled in your chosen platform!
Choose an Email Marketing Provider
We highly recommend using a specific email marketing provider to collect email addresses, as this is just the easiest way to manage your contacts and market to your community.
The only other option would be to collect email addresses and keep them in a spreadsheet on your computer, which is fine if you’re just starting out. But as soon as you get more than a handful of addresses, you’ll find that this method is very hard to manage. However, if you would prefer to do that, go ahead and skip over the next bit of information and head down to the section about adding a “Newsletter Block” to your site.
Now, choosing an email marketing provider can trip up a lot of people because there are so many out there, and, like we said at the beginning of this post, it’s easy to get overwhelmed. So, to make things a little bit easier for you, let’s go over the most popular options and those that are easiest to use with Squarespace.
There are only two platforms that integrate seamlessly with Squarespace, and those are:
Squarespace automatically links to both of these options, so you won’t need to worry about embedding or using code in order to add a sign-up form to your website. Plus, Squarespace Email Campaigns is (obviously) managed completely within the Squarespace platform, so you don’t have to deal with learning an entirely new system.
These are huge bonuses, but not necessarily the end-all-be-all. You might find that the above two options just aren’t the right fit for you, and it is still easy to integrate other email marketing platforms with your site!
Because of this, some of the other providers that we recommend are:
At the end of the day, your best bet is to do some research and figure out which platform is going to work best for you and your business, especially when it comes to pricing and features. They all have their own pros & cons and what works for one person, might not work for you.
You can also always do trial runs with multiple different platforms to get a feel for how everything works, and, if you’re still feeling stuck, we have a full blog post where we talk about the specifics of Squarespace Email Campaigns and how it compares to some alternate options. Check that out below!
👉 Should you use Squarespace Email Campaigns? Pros, Cons, and Alternatives
👉 Flodesk vs Squarespace Email Campaigns: Which Is Best for Your Business?
Choose an Enticing Offer and Create Your Email Sign-up Form
Once you’ve signed up for your chosen email marketing provider, it’s time to start thinking about the actual sign-up form.
Ultimately, there are two parts to getting your sign-up form up and running:
Creating an offer or freebie to entice visitors
Creating the actual sequence and/or form to deliver that offer to those that sign up
1. Create Your Offer or Freebie
Some more hard truths - people are only going to sign up for your newsletter if you have something worthy to give them in exchange for their email address! There needs to be some kind of incentive to encourage people to sign up, and there are many ways that you can go about this, but some popular offers include
News & Updates Newsletter: This is pretty minimal and will likely get you the least amount of sign-ups, but it’s not nothing! At the very least, you should have a system for sending out regular email updates to your community, keeping them in the loop about your business, what’s new, and what’s important for them to know.
A Discount of Some Kind: Discounts are great to offer, especially if you have an e-commerce business or if you sell physical and/or digital products. This could be something like “10% off when you sign up” or similar.
A Freebie: We LOVE a good freebie. Freebies are particularly useful if you have educational products and want to give people a look into your course or warm people up to your teaching style.
Pro Tip! We offer Freebie Add-On pages for all of our Premium Squarespace Templates. They’re perfect for advertising anything from a workbook to an online training and help to motivate people to sign-up and join your community. You can purchase these add-on pages as a bundle with any of our website templates (to get 30% off!), or on their own.

So, what are you going to offer? It doesn’t need to be too complicated, just make sure that it makes sense for your business and is created to target the type of people you want on your email list!
👉 Everything You Need to Know to Create Freebies That (actually) Grow Your Email List
2. Create the Sequence and/or Form to Deliver Your Offer or Freebie
After you’ve decided on the offer you think will suit your business and audience best, and have created it, you’ll need to set up the back-end of your email marketing system.
Essentially, you’ll need to make sure that
You have a Sign-up Form: You will need to create & design the actual sign-up form inside of your email marketing platform UNLESS you are using either Mailchimp or Squarespace Email Campaigns in which case you’ll do this within Squarespace.
The Form Allows Visitors to Enter their Details: You should configure your form to collect the necessary information from your visitors. This is typically a first and last name and an email address.
You have a Sequence or Automation set up: It’s important to set up the right sequence of events within your email marketing platform so that once someone signs up, they’ll automatically receive their offer or be added to the right email list.
The Form is Successfully Embedded on your Website: We’ll get to the specifics of this soon!
Unfortunately, each of these steps are going to be slightly different depending on which email marketing provider you’re using (we know, annoying!).
All of the platforms we mentioned make the process relatively easy, but more importantly, they should each have their own guidelines for how you can complete these steps and manage things on the back-end. And if for some reason they don’t, they should have a support team that can help you.
Don’t hesitate to reach out to their team and take advantage of their help centers. Setting things up with email marketing can be super confusing and frustrating, so if you need to, just ask! Once you do get the hang of your platform though, it’s usually pretty straightforward and repetitive, so don’t give up.
Adding Your Email Sign-up Form to Your Squarespace Website
Alright, you’ve made it this far! That means you should have:
Signed up for an email marketing platform
Decided on an opt-in offer or freebie
Created said opt-in offer or freebie
Created the sequence of events that will trigger the opt-in offer to get sent
Created a form in your email marketing platform (unless you’re working with Squarespace Email Campaigns or Mailchimp)
Set up a sequence to deliver your freebie and/or add your new subscriber to the correct email list
If you’ve done all of that, then all that’s left is to add your sign-up form to your Squarespace website!
There are two ways to go about doing this.
Newsletter Block: If you’re using either Squarespace Email Campaigns or Mailchimp, then you can add your sign-up form using a Newsletter Block
Embedding: If you’re using a different email marketing platform, you’ll need to embed your sign-up form into Squarespace
Option 1: Adding Your Email Sign-up Form with a Squarespace Newsletter Block
The Newsletter Block in Squarespace is awesome, but it only directly connects to the following platforms:
Squarespace Email Campaigns
Mailchimp
Google Drive
Zapier
For Squarespace Email Campaigns and Mailchimp users, this is a super simple connection.
The Google Drive connection is nice if you want to take the route of saving your email addresses to a spreadsheet. Like we mentioned above, this isn’t something we’d recommend for long-term email marketing, but it might be suitable in some circumstances.
And finally, Zapier is an app that connects platforms with other platforms. Where certain platforms don’t normally integrate, Zapier acts as the middle man and makes the connection possible! This is a pretty handy service that is helpful for a lot of things, including connecting the Newsletter Block with other email providers.
Important! While Zapier is convenient, you shouldn’t immediately jump to using it. There is a more common way to connect your third party email marketing platform to Squarespace and most of the other providers (Flodesk, Kit, etc) make it really easy to accomplish, so Zapier might not even be necessary. We’re going to talk more about that other option a bit further down.
Adding the Newsletter Block
To add the Newsletter Block to a section on your Squarespace site, first enter Editing Mode by clicking on the “Edit” button in the top left of your screen, and then navigate to wherever you’d like to add the block.
In your desired section, click on the Add Block button in the top left corner and choose the Newsletter Block.

Move the Newsletter Block wherever you’d like within the section, and then double click on the block to open up its Settings.
Once the Settings window is open, navigate to the Storage tab.

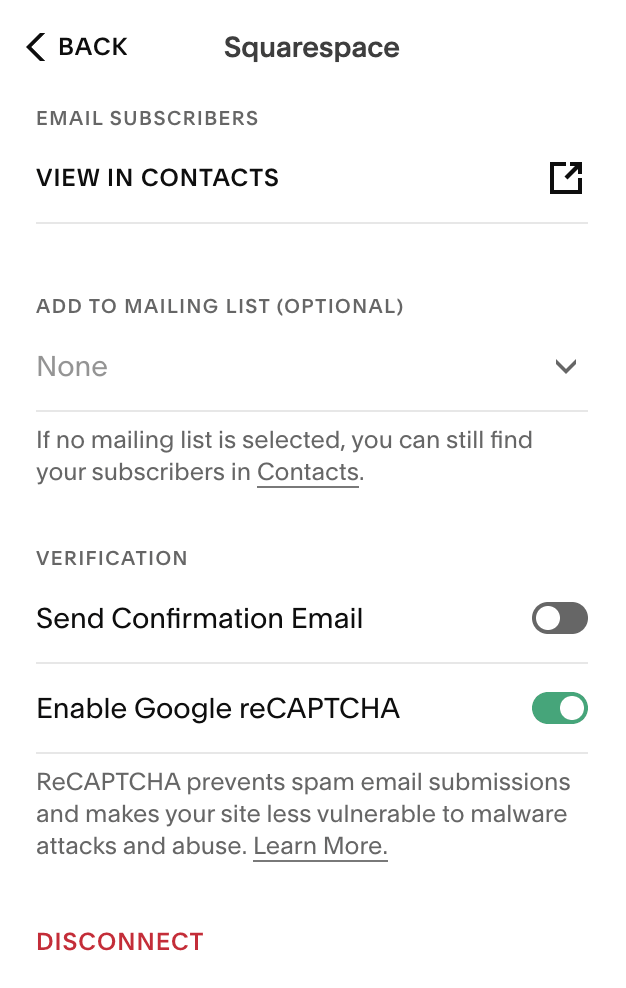
If you are using Squarespace Email Campaigns, click into where it says “Squarespace” and here you can choose which mailing list you want to add subscribers to, set-up a verification method, or disconnect your campaigns account.
If you’re using a different email marketing platform, click into where it says “Other Storage Options”, choose either Google Drive, Mailchimp, or Zapier, and then follow the steps to connect.

Next, you’ll want to click into the Content tab to customize the specific information that will appear to subscribers.

In this tab, you can edit
Form Name: Add a descriptive name for your form so that you can tell where submissions are coming from. This is for your back-end only.
Title: This title will appear in your Newsletter Block. You can leave this blank if you don’t want any title to show.
Description: Add a description for your newsletter or freebie that will appear in your Newsletter Block. You can leave this blank if you don’t want any description to show.
Disclaimer: If you want to add a privacy disclaimer or notice you can do that here. This disclaimer will appear below the subscriber information fields. Leave this blank if you don’t want anything to show.
Button Text: Customize the text of your sign-up button. You can make this something fun like “Sign Me Up” or “Yes, Please!”
Show Name Field: Toggle this option ON to require a first and last name from subscribers.
Post-Submit: Here you can either write in a custom message that will appear after someone has subscribed, or you can choose “Redirect” and attach a link to a custom “Thank You” page that you’ve designed.
Be sure to click Save in the top left corner of your screen when you’re done.
Styling the Newsletter Block
Once you’ve set up all the technical info for your Newsletter Block, you can click into the Design tab to customize the look of your email sign-up form!

In this tab, you can edit
Layout: Choose between Stack (vertical) or Float (horizontal).
Alignment: Align all of the content within your block to the left, right, or center.
Background: Toggle this option ON to add a background color to your block. If you choose to do this, you’ll then be able to choose a color from your existing palette, decide whether or not to add a border stroke around the background color, and customize the corners and padding of the background color.
Stroke: If you'd like, you can choose between a solid or dotted line border stroke for your block.
Blend Mode: Choose how you want the colors of the block to blend or leave it as “Normal” to keep things as they are.
Blur: Toggle this option ON if you want to add a blurring effect to your content.
And again, be sure to click Save in the top left corner of your screen when you’re happy with your design.
Important! The style settings for the Newsletter Block are much more limited in Squarespace 7.0, so just keep that in mind if you’re not currently using the Fluid Engine Editor.
In the end, you should have a beautiful and functional email sign-up form that’s sure to capture the attention of your site visitors.


Option 2: Adding Your Email Sign-up Form by Embedding it into Squarespace
If you’ve chosen to use an email marketing provider that doesn’t directly integrate with Squarespace (Flodesk, Kit, etc.), you can connect your email sign-up form by embedding it into your website.
Don’t worry! We promise, this is not as scary as it sounds. It generally only requires one or two simple lines of code that you can copy, paste, and call it a day!
In order to do this, you’ll need to create and design your sign-up form within your specific email marketing platform (which we already discussed), and then they will provide you with instructions and any necessary “embed code(s)”.
👉 How to connect Flodesk to Squarespace
Again, this is going to be a little bit different depending on which platform you’re using, but typically the codes you’ll be given fall under one of two categories.
The Form Code
This is going to be the direct embed code for your sign-up form, and you can add this to your website by using a Code Block.

Example of Form Code Provided by Flodesk
To add a Code Block, enter Editing Mode and navigate to the desired section. You’ll then click Add Block and choose Code Block.

Move the Code Block wherever you’d like in the section, and then double click on the block to open up the Content Window. Delete the filler code that’s there and directly paste in your sign-up form code so that it looks like this:

Click Save and that’s it!
The Header/Footer Code
Sometimes a platform will also provide you with a bit of code that needs to be inserted into the Advanced Header and/or Footer Code Injection in addition to the main form code.
Not all platforms will require this, but if they do, here’s how you’ll implement it.
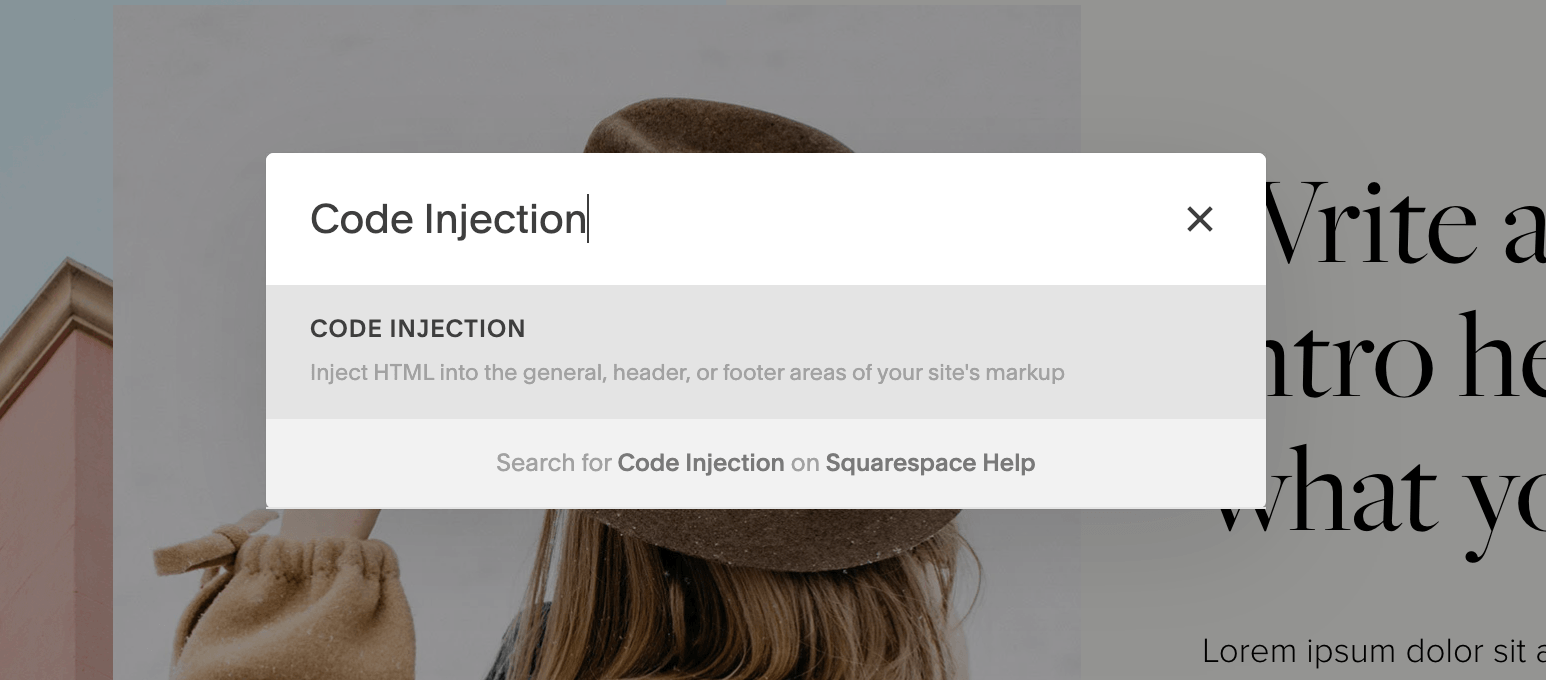
Navigate to the Advanced Code Injection panel by clicking the slash key ( / ) on your keyboard and typing in “Code Injection”. This will take you straight there!
You’ll then copy and paste the provided code into either the Header or Footer injection window (your specific platform will tell you where to add it) so that it looks something like this:

Click Save and you’re all set.
Embedding your sign-up form this way is generally a better option than using Zapier to connect through the Newsletter Block, as it cuts out the need for an additional platform (aka Zapier). And trust us, the less amount of systems you have to worry about, the better.
But, this is also a personal decision and one that should be made case-by-case. Depending on the email marketing provider you’re using, you might find that the embed system is way too complicated or that you don’t like the design options for your sign-up form. In this case, Zapier might be the best bet for you!
Recap!
Phew, that was a lot of info! Ultimately, there are a lot of decisions to make before you can have an email sign-up form up and running like:
Who will be your email marketing provider?
What will your sign-up incentive be?
How do you want to connect your sign-up form to your Squarespace website?
Hopefully this post has given you more insight into all of the options you have to help you make a decision quickly, because the best time to start your email list is, well, yesterday!
There really is no one right answer when it comes to adding an email sign-up form to your website. Whatever you end up doing, as long as it’s helpful and functional for your subscribers, then great! You can always change your provider down the line, adjust your offer/freebie, and even switch the way you connect the form to your site. None of these things are 100% set in stone, so don’t stress too much. Just do whatever is easiest and makes the most sense for you and your business!
Want more website tips? Check out the posts below:
How to Add a Pop-up in Squarespace
Website Pages That Will Increase Your Revenue (and you Should add Today!)
How to Design and Optimize Your Homepage for Better Results
How & Why you Should Create a Custom “404 Not Found” Page in Squarespace
How to Deliver an Opt-In Freebie Instantly in Squarespace
If you liked this post, Pin it to Pinterest! 👇🏻
