

How to add a Header Video to Your Squarespace 7.0 or 7.1 Site
Video content is not only trendy on social media–we’re seeing it gain traction in website design as well! Having a video header on your Squarespace website is one of the easiest ways to pull your audience in and keep them engaged with your website content. If you’re looking to add a video to the banner or header of your Squarespace website, then follow the tutorial below!
We have included instructions for how to add a header video in Squarespace 7.1, and further down we cover Squarespace 7.0 and all of the different templates!

How to Create a Video Header in Squarespace 7.1
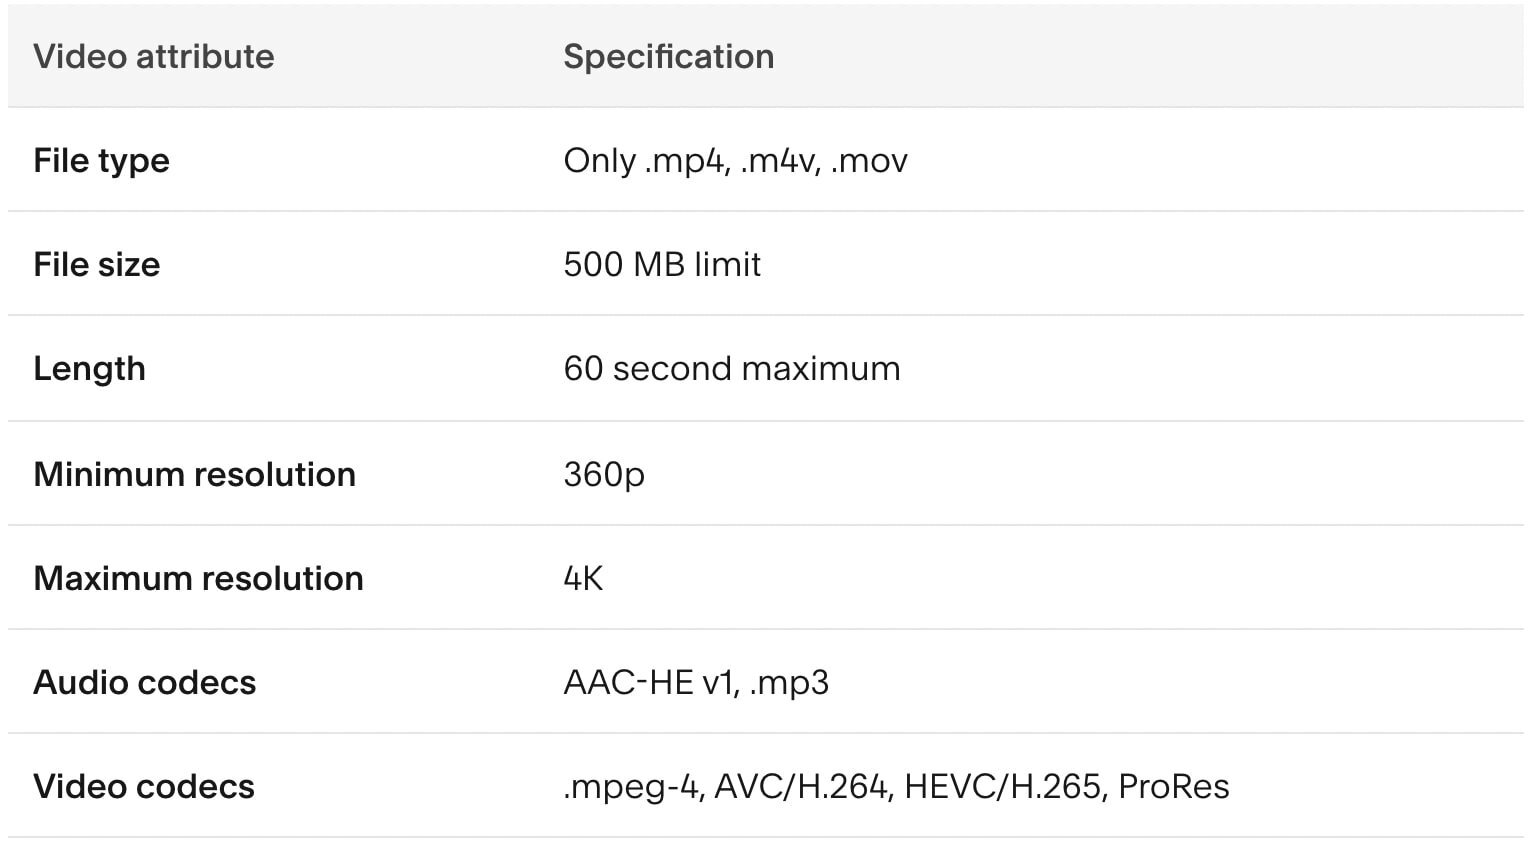
If you are using Squarespace 7.1, you have the option to upload your own videos to section headers or to add them from a Youtube or Vimeo link. Please ensure that the video you choose meets the requirements below:
Navigate to the page you’d like to add the video header to
Click EDIT on the page
Navigate to the section you’d like to add a video header to OR add a new section
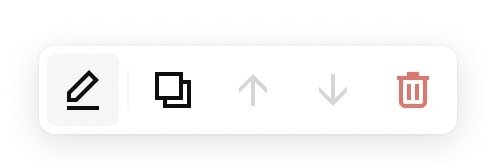
Click the PENCIL icon in the menu to the right to open the section settings
Click BACKGROUND
Click VIDEO

Click the + button in the video box to upload your video from a file, from your library, or from a video URL
To upload a video from your device, click UPLOAD FILE
To use an existing video that you’ve previously uploaded, click SELECT FROM LIBRARY
To add a video from a YouTube or Vimeo URL, click ADD FROM LINK
Once your video has been uploaded, hover over DONE in the upper left corner and click SAVE
Customizing Video Header Settings for Squarespace 7.1
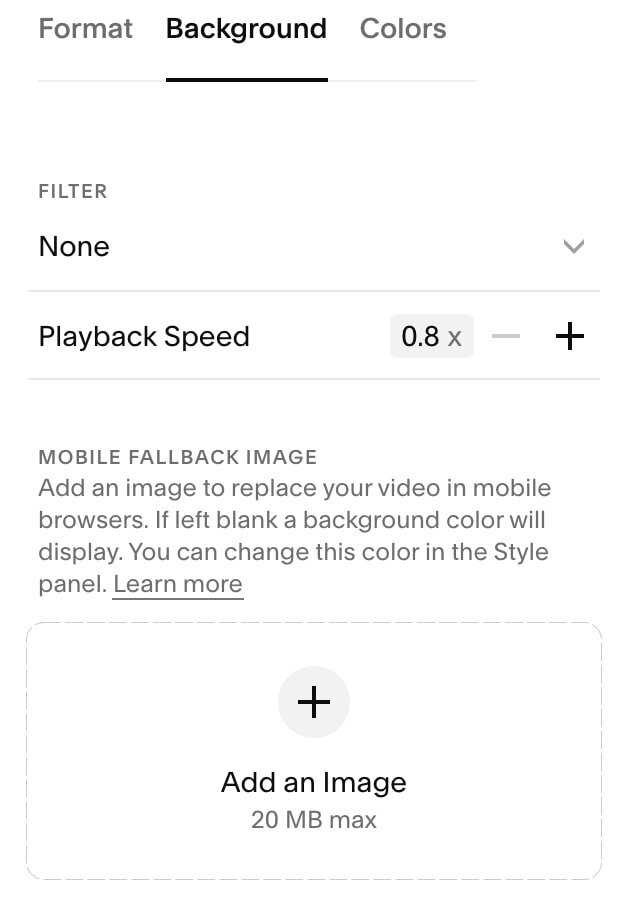
Squarespace 7.1 allows you to adjust the width of your video, add a filter, change the playback speed, or insert a mobile fallback image.
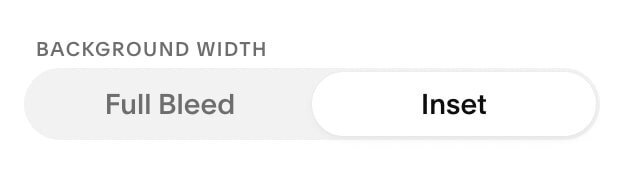
Background Width
Choose between a full bleed video display (extending all the way to the edges of the screen) or an inset video display (your video will not extend to the margins of the screen)
In the same BACKGROUND menu, select VIDEO and scroll down past your video preview
Toggle between FULL BLEED and INSET to decide which option you want
Add a Filter
Give your video a stylized look with Squarespace’s built-in filters
In the same BACKGROUND menu, select VIDEO and scroll down past your video preview
Select the filter that you would like to use from the dropdown menu

Adjust Playback Speed
Manipulates the rate at which your video plays
Simply click the + or - button to add/subtract 0.5 from your video playback speed or input a custom value directly into the box

Mobile Fallback Image
Depending on the connection speed and browser version of each mobile phone, video headers may not load every time. A mobile fallback image will appear in case the video cannot load.
Scroll past playback speed and simply upload the image that you would like as a backup
The filter that you set above will also apply to this fallback image.

How to Create a Video Header in Squarespace 7.0
Please note that if you’re working with a Squarespace 7.0 website, video headers are only available with templates in the following families and sections:
Adirondack - Layout, products, album, events, blog
Bedford - Layout, products, album, events, blog
Brine - Layout, album, events, blog
Five - Layout, album, events, blog
Montauk - Layout, events, blog, index (must have a mobile fallback image)
Pacific - Layout, products, album, events, blog
Tremont - Layout, products, album, events, blog
York - Layout, products, album, events, blog, project, index
Video banners on Index Pages only work with these templates:
Bedford
Brine
Montauk
Pacific
York
Before we begin, double-check that you are working with an appropriate template. Not sure how to do so? Check out this article.
Once you’ve confirmed that a video header will indeed work with your template, let’s get started!
Locate & Upload the Background Video
Squarespace 7.0 requires a video to be externally hosted either on Youtube or Vimeo in order for it to play as a background video.
YouTube:
Create or log in to your YouTube account
Upload a new video that you’d like to use for the header/banner or locate one that you’ve already uploaded
Set the visibility settings to unlisted and public so that it will embed on your Squarespace website
Copy the video’s share URL
Vimeo:
Create or log in to your Vimeo account
Upload a new video that you’d like to use for the header/banner or locate one that you’ve already uploaded
Ensure that the video visibility is set to Anyone and allows embedding
Copy the video’s share URL
Creating a Video Header for a Page Banner
This applies to regular Pages. If you're using an Index Page in Squarespace 7.0, refer to the instructions below.
This works for templates in the Adirondack, Bedford, Brine, Five, Montauk, Pacific, Tremont, and York templates (please reference specifics in the list above).
Navigate to the page that you’d like to create the video banner on
Hover your cursor in the upper left corner of the page until Page Content shows and click BANNER

Open the MEDIA tab in the pop-up settings

Click the VIDEO tab within media settings

Insert your YouTube or Vimeo URL into the Video URL field
Click SAVE
Creating a Video Banner for Pages in an Index
This works for templates in the Bedford, Brine, Montauk, Pacific, and York templates when using Index Pages.
Navigate to the Index Section that you would like to add the video banner for, or add a new Index Section
Hover your cursor in the upper left corner of the index section until the page title shows and then click BANNER

Open the MEDIA tab in the pop-up settings

Click the VIDEO tab within media settings

Insert your YouTube or Vimeo URL into the Video URL field
Click SAVE
Customizing Video Settings for Squarespace 7.0
Squarespace 7.0 allows you to add a filter, change the playback speed of your video, or insert a mobile fallback image.
Add a Filter
Give your video a stylized look with Squarespace’s built-in filters
Open the MEDIA tab in page settings
Click the VIDEO tab and scroll down past the video preview
Select the filter that you would like to use from the dropdown menu

Adjust playback speed
Manipulates the rate at which your video plays
Simply move the slider back and forth to adjust the speed. Squarespace allows you to slow it down as much as 0.5 x speed or speed it up as much as 2 x speed.

Mobile fallback image
Depending on the connection speed and browser version of each mobile phone, video headers may not load every time. A mobile fallback image will appear in case the video cannot load.
Scroll past playback speed and simply upload the image that you would like as a backup
The filter that you set above will also apply to this fallback image.

Making the Video Header Height or Video Index Section Larger in Squarespace 7.0
Adirondack template family
Site-Wide Adjustment of Video Header Height
Please note that this will change the header height across all pages on your website.
Navigate to the main site settings and click DESIGN > SITE STYLES
Search “banner image” in the search bar
Adjust the slider to match your desired height (please note that the banner height for mobile devices is set and cannot be adjusted)
Click SAVE when you’re done editing

Bedford template family
Adjusting Video Header or Index Section Height:
To modify the height of the video header in the Bedford Template, you will need to adjust the page description
Navigate to the page you are trying to edit and hit the settings cog to the right of the page title

Click GENERAL in page settings
Scroll down to PAGE DESCRIPTION
Add any text that you would like to display over the background video
Add height to your header by hitting ENTER

You may have to toggle back and forth between the page and the page settings to see if you’ve achieved the desired header height
Click SAVE when you are satisfied with the header height
Brine template family
Adjusting Video Header Height for Individual Pages
Hover over the video header and click EDIT
Click the + in the upper right corner to add a SPACER block
You can adjust the SPACER height by clicking the block and then dragging the bottom margin to your desired height
Click SAVE when you’re done editing
Site-wide Adjustment Of Video Header Height
Please note that this will change the header height across all pages on your website.
Navigate to the main site settings and click DESIGN > SITE STYLES
Search “main” in the search bar
Find the “Intro Padding (With Background Image)” and adjust the slider to match your desired height
Click SAVE when you’re done editing

Adjusting Video Index Section Height:
Navigate to the page within your index with the video background
Hover over the upper left corner of that section and click EDIT
Click the + in the upper right corner to add a SPACER block
You can adjust the SPACER height by clicking the block and then dragging the bottom margin to your desired height

Five template family
Site-Wide Adjustment of Video Header Height
Please note that this will change the header height across all pages on your website.
Navigate to the main site settings and click DESIGN > SITE STYLES
Click the video header to the right and the styles panel will showcase all relevant settings
Locate “banner area spacing” and adjust the slider to match your desired height
Click SAVE when you’re done editing

Montauk template family
Adjusting Video Header Height:
The width and height of headers in the Montauk are fixed
Width: the width will always display at the width of the canvas area
Height: The height is set by the mobile fallback image height. You can adjust this by editing the fallback image so that it matches your desired video header height.
Adjusting Video Index Section Height:
The width and height of headers in the Montauk are fixed
To adjust the video index section height, hover your cursor over the upper left corner of the page and click BANNER in the Index navigation

In the MEDIA tab of Index settings, upload a mobile fallback image with your desired video header height
Click SAVE when you’re done editing
Pacific template family
Site-Wide Adjustment of Video Header Height
Please note that this will change the header height across all pages on your website.
Navigate to the main site settings and click DESIGN > SITE STYLES
Search “page banner” in the search bar
Find the “padding” and adjust the slider to match your desired height
Click SAVE when you’re done editing

Adjusting Video Index Section Height:
Navigate to the page within your index with the video background
Hover over the upper left corner of that section and click EDIT
Click the + in the upper right corner to add a SPACER block
You can adjust the SPACER height by clicking the block and then dragging the bottom margin to your desired height

York template family
Site-Wide Adjustment of Video Header Height
Please note that this will change the header height across all pages on your website.
Navigate to the main site settings and click DESIGN > SITE STYLES
Search “banner” in the search bar
Find the “height” and adjust to set the video header height
Click SAVE when you’re done editing

Adjusting Video Index Section Height:
Navigate to the page within your index with the video background
Navigate to the main site settings and click DESIGN > SITE STYLES
Click the video header to the right and the styles panel will showcase all relevant settings
Find the “item height” and adjust to set the video header height
Click SAVE when you’re done editing

Hopefully, you found the tutorial above helpful, and your banner or header video is looking sharp!
Want more tips? Check out the posts below!
How to create a sticky header navigation in Squarespace
How to add a button to your header navigation in Squarespace
How to create a full width Instagram feed in Squarespace 7.1
Creating an “as featured in” logo bar on Squarespace
If you liked this post, Pin it to Pinterest! 👇🏻
