

How to Customize your Header Navigation in Squarespace 7.1 Fluid Engine (2024 update)
Your website’s header navigation, ie. the very first thing on your website that allows your site visitors to seamlessly navigate around, is a pretty crucial piece of the successful website puzzle.
You want to make sure your website header is as clear as can be. It should feature links to other important pages on your site, a call-to-action button encouraging visitors to view your shop or get in touch about your services, and other useful elements that will give them crucial clues about you and your business like your site title or logo and links to your socials.
Other than that, you can actually get pretty creative with your header navigation! You can make it transparent, you can make it stick, you can add a slideshow in the background, or take it up a notch with fun plugins and extra customisations, and luckily, Squarespace makes it super easy to customize it however you like!
At the start of 2024, Squarespace did do a bit of an overhaul of their header navigation settings, so to keep you up to date with how to customize your header exactly as you please, we’ve put together a handy tutorial walking you through all the new settings, step by step!
Let’s dive in!👇

How to edit your site title and logo
Having your site title, business name, or logo somewhere at the top of your website is key for brand recognition and for your site visitors to basically know whose site they've landed on!
To customize this crucial element in your website navigation header, click Edit on your Squarespace site, hover over the navigation section, and click Edit Site Header.

If this isn't something that you have customized yet, by default, Squarespace will always add your site title into the header navigation.
Find your site title or logo (if you've added one in the past), hover over it and a blue box titled 'site title & logo' will appear.

Click on the box and click on the pencil icon to access the settings.

Here, you will be able to go ahead and change your site title as well as upload a logo image if you like!

Tip! Even if you have a dedicated logo for your website, you will still want to enter a site title as this is what will show up in all browsers! So even if you've uploaded a logo, make sure to add your business name or another name that clearly signifies your business.

Once you've uploaded your logo, you'll notice additional settings appear to adjust your logo and mobile logo height.

If you scroll further down, you'll also be able to upload a custom mobile logo. This is optional, though a great option if you maybe have a more compact secondary logo that may fit mobile view better.

You can see how your site header and logo appear in mobile view at anytime by clicking the mobile icon in the top right corner of your website.


How to customize your website header's layout and design
Next, click the Edit Design button in the bottom right of your website header to customize your header's layout.

Design tab
In the pop up menu, click on the Layout dropdown to select from a few different configurations.
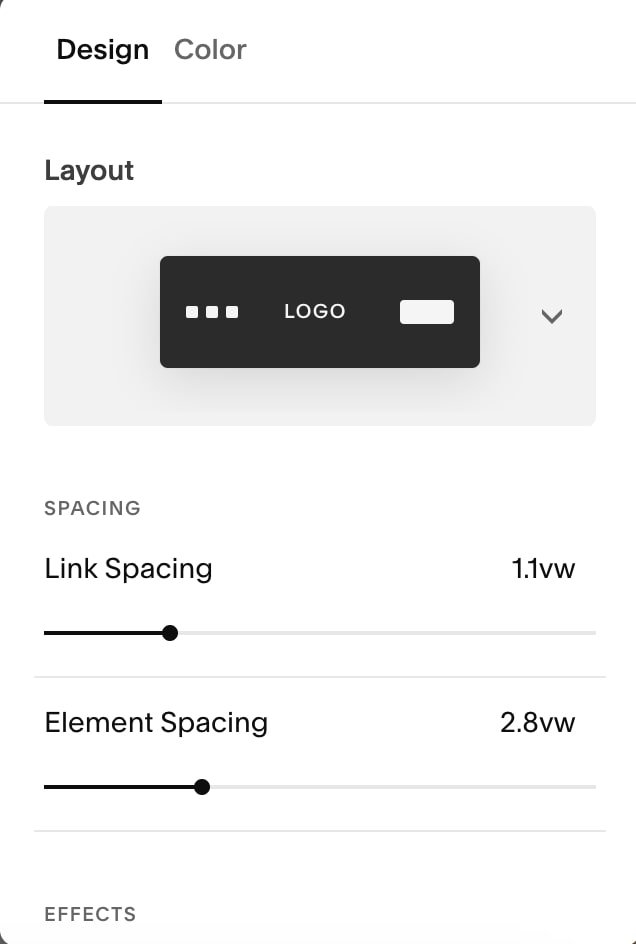

You will then be able to play around with the spacing of your header links and the individual elements within your header, as well as add effects like drop shadows or borders.

You will also be able to toggle on whether you would like your header to stay fixed on your site, and select the Fixed Header Style from there.
If you select Basic, your header will always be visible at the top of the page, no matter how far down you scroll.
If you select Scroll Back, your header will be visible as your site visitor scrolls back up any of your website pages.


Further down the menu, you will be able to adjust the height of your header as well as the width.

Color tab
Under the color tab, you'll be able to select from a few different styles.

Adaptive: Your header menu will take on the characteristics of the first section on the page, whether it's a full width image or a solid color, your menu will just adapt to whatever is there.

Solid: This will give your header a solid colored background. You will be able to choose a custom background color or select from one of your color themes set up in your Site Styles.

Gradient: You will also be able to choose to have your menu appear as a gradient, and again you will be able to customize the color and opacity.

Once you're happy with all of these design elements, just click anywhere outside of that window to exit.
How to add or remove elements in your website header
Click the +Add Elements button in the bottom left of the header navigation.

In the pop up menu, you will be able to toggle on and off whichever elements you would like to display in your site header

How to customize the elements in your site header
Once you're happy with the elements that you've added to your header, you can then go through and click into each individual element to edit it further.
How to edit your site header button
If you toggled on the button feature in the Add Element tab, you will be able to click on your button to bring up a few more setting options.

Click on the pencil icon to access further settings.
In the Content tab, you'll be able to edit the button text as well as add a link by clicking on the Attach Link button

In the Design tab, you will be able to change the design style of your button. You will be able to select from the primary, secondary, or tertiary button styles that you would have set in your Site Styles. If you would like to customize these further, click Edit Button Styles and you will be taken straight to your Site Styles. Note that any changes you make will apply to all other buttons in that style anywhere else on your site!

How to edit social links in your site header
If you have enabled social links in your header, click on your socials links and on the pencil icon that pops up to access further settings.

Under the Content tab, you will be able to add more social links by clicking Add Social Link and typing in your social link URL (eg. facebook.com/bigcatcreative or instagram/com/bigcatcreative) and pressing Enter.

Click on the social links that you have entered to access further settings. You will be able to edit the URL, choose whether you would like to display a social icon for this particular platform, or choose to remove the link entirely.

Click Back, then head to the Design tab. Here you will be able to customize the style of your social icons by adjusting their size and selecting a border style.

If you have enabled social links but you do not see them in your site header, this may because you don't have any social links connected to your site! If this is the case, hover over your site header until the social links blue highlight box appears (even if the social links are transparent 🙃)

Click in and add your social links just as we described above.
How to edit your site header navigation links
Hover over your navigation links in your site header, click on them, then click on the pencil icon to access the settings tab.

Here, you'll be able to customize the order in which your navigation links appear by dragging and dropping them in the order you want.

To add or remove pages in your site navigation, click Show Pages at the bottom of the panel. This will take you back to your Pages panel.
Here you will be able to drag and drop any of your pages into the Main Navigation section of your Pages Panel for them to appear in your site header. Move any pages that you don't want to appear in the site header down to the Not Linked pages section.

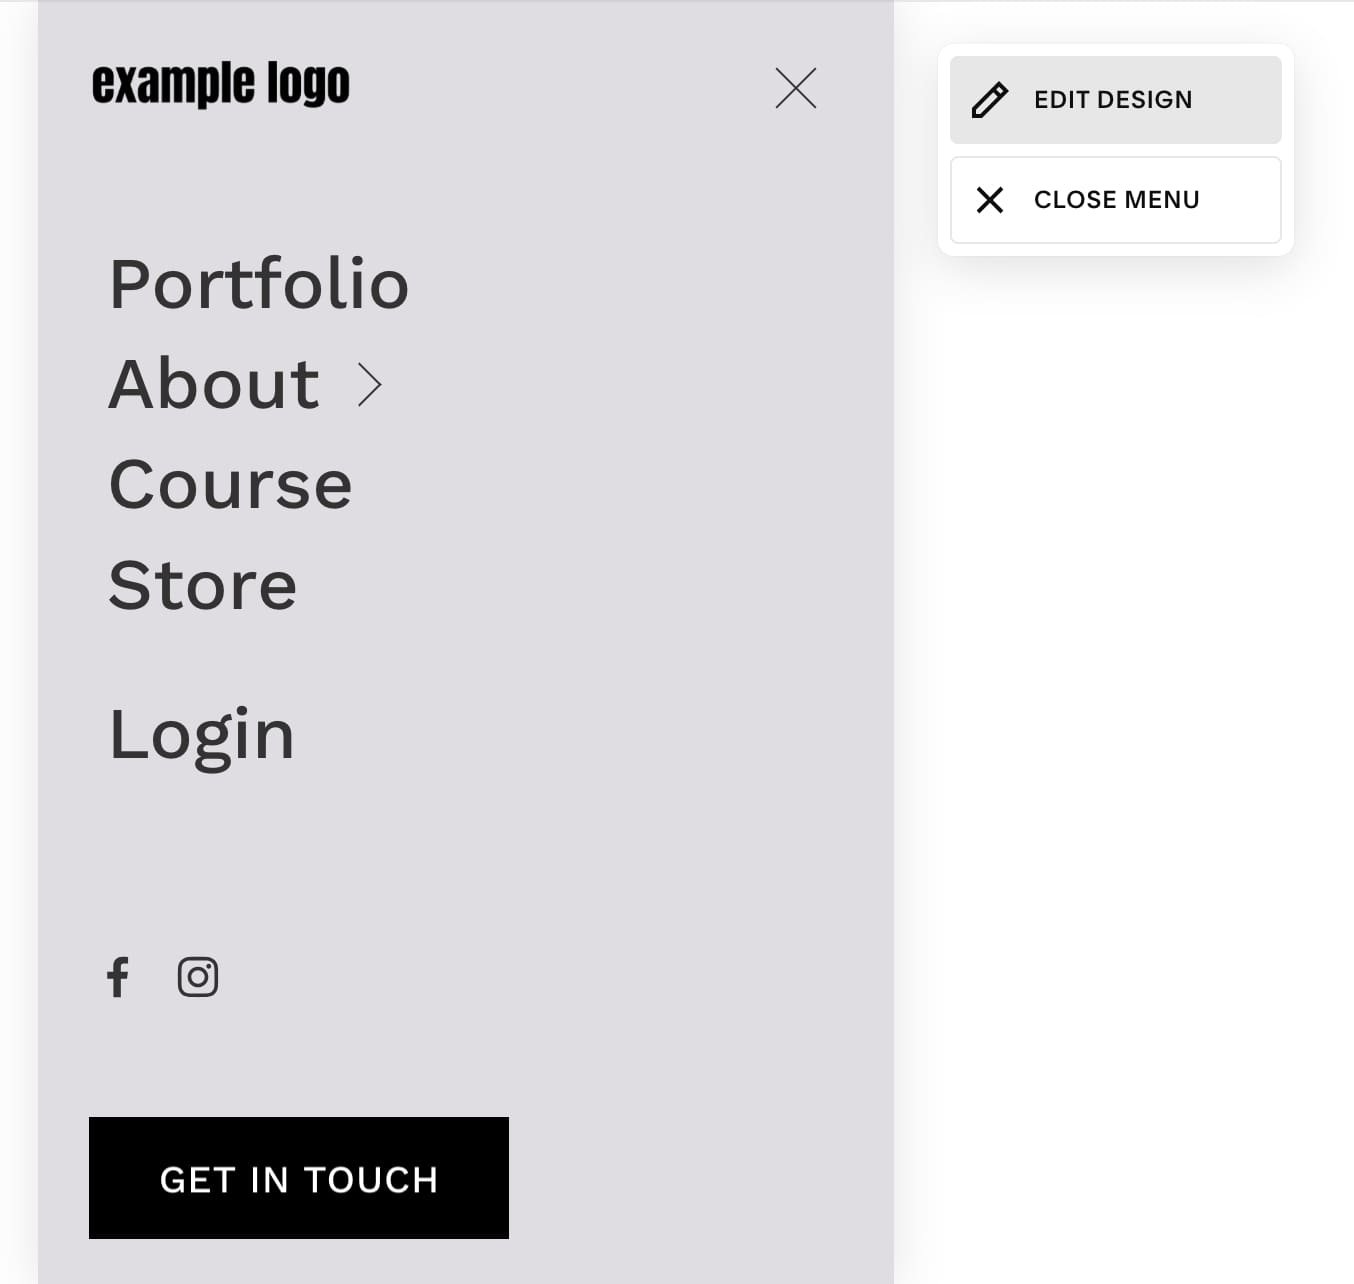
How to customize your mobile navigation
Once you're happy with how your header navigation looks on desktop, you'll want to make sure to click into mobile view so that you can edit your mobile menu separately!
To do that, click the mobile icon in the top right corner of your site.

You will then be able to click the Edit Design button to choose your navigation layout, add fun effects, and choose a position and style just like for desktop view.


Important! These design elements are not independent on mobile view! So whatever you've set these as for desktop, it's automatically going to be set that way for mobile view as well. For example, if you've added a fixed position while you were in desktop mode, you'll notice that that will be toggled on in mobile view too. This also applies to the settings in the Color tab.
To view and customize the mobile menu, click on the View Menu button.

Just like on desktop, you'll then be able to click into each individual element to adjust its settings.

In the menu view, you'll also be able to click a Edit Design button.
Here, you'll be able to adjust the alignment of your menu as well as the spacing between each item. Under color, you'll be able to choose from your different color theme options to change the background color of your menu.


👉 For a full breakdown of how to customize your mobile navigation menu, check out this post
Once you're happy with how everything looks, click out and then click Close Menu.
Be sure to save your changes like always, and that is how you customize your desktop and mobile header settings in Squarespace!
Want more handy Squarespace tips? Check out the post below 👇
How to customize your Squarespace footer and what to include in the design
How to customize your mobile design in Squarespace 7.1 with the new Fluid Engine Editor
How to backup your Squarespace website
10 Fun Customisations for your Header Navigation Menu in Squarespace
How to Edit your Button Design in Squarespace 7.1
If you liked this post, Pin it to Pinterest! 👇🏻
