

How to optimize images for Squarespace
Optimizing images correctly for Squarespace is SO IMPORTANT. Seriously. And if you’re DIYing your Squarespace website, this is often overlooked.
It’s important for a few reasons:
Website speed, because large images will slow down your website (turning people away).
SEO, because a slow website and unnamed images will not impress Search Engines (lowering your rank in Google).
General good design practices and not scaring potential customers away with your bad images.
SEO is short for “Search Engine Optimization”. This means optimizing your website as much as possible to work WITH the Search Engines (e.g. Google) and not against them. If you start implementing SEO, your website will begin to rank higher in the Search Engines. This means a lot more traffic!
Implementing SEO takes a bit of learning, and adding it is mostly manual. But once you know the best practices it becomes second nature.
At first you might think this is all a lot of extra work, but once you’ve done the process a few times, it’s really easy!
Resize and Compress your Images
If your images are too large, they will slow down the time it takes for your website to load. This can be frustrating for people visiting your site.
They say that the average person will wait no longer than about 5 seconds for a website to load before they give up and leave. If you’re using a lot of large images on your website, there’s a good chance that it’s taking more than 5 seconds to load, and you’re losing potential customers.
Not only that, but Search Engines prefer websites that load faster. So if you’re website is clunky and slow, Google will be pushing it down further on the list.
To avoid these problems, you’ll need to reduce the size of your images. This can mean reducing the actual size (Pixels), and compressing to reduce the quality (KBs).
General size rules:
For Banner images I would try not to go under 2000 pixels wide. Other site images should be between 500-1500 pixels wide, depending on where you will use them. This ensures that the image will still look good (not pixelate), but it is small enough to help to bring the file size down.
For banner images or large images, I aim for under 500KB. For special portfolio pieces where I want the image large and high quality I sometimes will go over that, but I try not to. Usually in Blog posts I’m using screenshots and smaller images, so these come way under the 500KB mark, usually between 20KB-100KB.
Rule of thumb is to get the image size as small as possible without losing quality or pixelating the image.
Here’s a quick recap of sizes that you should aim for:
Large banner images: 2000-2500px wide, aim for 500KB or less.
Medium website images: 500-1500px wide, aim for between 100-400KB.
Screenshots for blog or small images: 500px wide, aim for between 10-300KB.
Always think: as small as I can get them whilst still retaining great image quality (more on that below).
Tip to keep your images as small as possible:
Use JPGs where you can. JPGs have the ability to compress more than PNGs.
Only use PNGs when you need to, for example when you have an image with transparent sections.
Now that you know what size you need to make your images, how do you do it?
Resizing with Photoshop
If you have Photoshop, I start by resizing the image by going Image > Image size then resizing to the recommended pixel-width sizes above.
Then use the File > Save for Web feature and save it as a JPG High, Low or Medium. When you toggle these options, you can see the quality and the size in KBs. Adjust these options until you are happy with the quality of the image and the size.
NOTE: You can do these exact same steps in Illustrator if you prefer to use that.

Resizing with Preview then online tools
If you don’t have Photoshop or Illustrator, you can open up your image in the Preview app (on Mac).
Click Tools > Adjust Size and adjust the size to one of the suggested sizes above.
Make sure the “scale proportionally” is CHECKED, so the image doesn’t stretch.
Resizing the image will bring down the KBs too, but it may not be enough.

If you’re on a windows computer and don’t have the preview app, hopefully you have a similar photo viewing app where you can change the size.
If you don’t, you could use Canva and create a new page in the size you want, import your image to the Canva page, then re-download your image in the new size.
After resizing with the Preview app or Canva, you will probably need to compress your image further:
Head to TinyJPG.com or Compressjpg.com
These are both online image compressors. They both take PNGs and JPGs which are the file types you will probably be using around your site (see the tip above about PNGs and JPGs)
All you need to do is upload your resized file here and it will compress the file size to be smaller, then you re-download it. It’s SO easy!
You can choose between either platform. They both provide quite different results so choose what works best for you and your images.
This is such a useful tool and I suggest compressing every image you upload with this if you're not using Photoshop or Illustrator.
Image Quality
I always think that this is a basic once that shouldn’t have to be explained. But, all of the time I am reminded that this is something that needs to be talked about. This goes hand in hand with compressing your images.
Don’t compress your images so much that they look bad. Or, don’t use images that look bad in the first place. By bad I mean pixelated, stretched and distorted.
Having good quality images on your website is essential to having a great website design. And as a designer I see DIY users do this time and time again.
It’s not a good look, it’s unprofessional and seriously can turn people away.
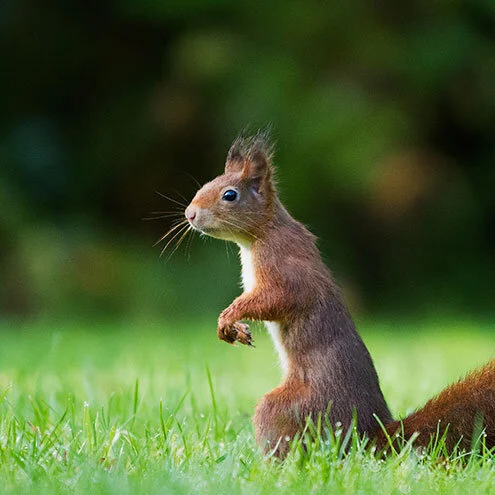
Examples:
This is a good quality image:
This is a bad quality image:

This is a stretched/distorted image:

Can you see the difference between all 3?
Start by using high quality stock images, this will ensure that your images are large enough to start with. Then follow my instructions to compress them. If you’re losing image quality, you’ve gone too far. You have to find that happy medium.
Related Post > Top 10 FREE Stock Image Websites
Sometimes it’s hard to know exactly what the images are going to look like when they’re on the website. Depending on what size they are, they might look better, or worse, when put in their designated spot on the website. Luckily, Squarespace is a front end builder, so you can check what your images look like as you put them in.
But always remember that every monitor is different. Among different sizes there is now retina screens that view websites in a higher resolution. If you have the chance, check your website out on all of these types of monitors and see how it looks. But if that’s not possible, my guidelines should cover all basis!
Naming your Images
This one’s important for SEO. Because Search Engines can’t see what images are, they search for the image file name in the hopes that the image name will be representative of what the actual image is.
This means you have to name all of your images accordingly. Even though you can’t see this name in your post, Search Engines can.
There’s two steps to this process that I recommend:
Name the actual file on your computer before you upload it
Then, once you upload it (via an image block) you can rename it in the actual image block settings under Filename
This covers all naming-bases!

Call the image something to do with your business. For example, if I’m uploading my portfolio pieces, I call the files something like “Branding Style Board for Shay Smith Photography by Big Cat Creative”. If I’m writing a blog post, I like to use my Keyword Phrase within the image titles.
Related Post > Optimize Squarespace Blogs Posts for SEO (Keywords explained)
Make renaming your images a habit, and it will improve your SEO. Every single image on your website should be named.
Those are the 3 things that you need to do when uploading images to Squarespace. Think: Image Size + Compress, Rename, Quality. Once you get into doing this regularly it becomes second nature!
More posts about Squarespace SEO that you might be interested in! 👇
5 Quick & Easy SEO Improvements for Squarespace
The Ultimate Blog Post SEO Pre-Publish Checklist (for Squarespace)
How to Optimize Your Squarespace Blog Posts for SEO
Squarespace SEO Tip: How to optimize your URL slugs (& why you should)
Liked this post? Pin it to Pinterest! 👇
