

How to create a live demo Squarespace Template (and what to do when the trial expires!)
So, you’re thinking about creating a Squarespace Template, or maybe you’ve created one already, but you’re not sure how to share a live demo of it so that your potential customers can actually see it (and revel in your creativity✨).
We know this can be pretty confusing when you first start out!
One of the most common questions we get is, “are you paying for all of those demos?!”
No! Absolutely not! We have about seventeen templates so that would be something like thousands of dollars every year in subscriptions (no thanks! 🙅🏽♀️).
The good news is that you can share a live demo of your website template, and for free!
Even better news, it’s super easy to do! So let’s dive straight into how to create a live demo, and link it on your site for all your potential customers to see.
Why live demos are great if you’re selling templates
You can take as many full page screenshots or create as many scrolling animations as you want, but truly, a live demo of your website template will ALWAYS be the best way to showcase your template in all its glory.
Not only is it the best way for your customers to see what they will actually be getting when they purchase your template, it’s also a great way for them to imagine what they’ll be able to do with it, how their content can fit in, and how your template can help their biz!
Not totally sure what we mean by live demo? Here’s how we’ve done it:
Each of our template sales pages features a View Demo button:

When you click on it, it takes you to a live preview of the template. This is the exact website that we duplicate and deliver to our customers, so our customers can know exactly what to expect when purchasing!
Click below to view the live demo of our Victoria template👇
Pretty cool, right?
The demo works exactly like a live website, you can click all the buttons, view all the pages, and interact with it…well… just like any other website! The trick is, this is just a Squarespace Free Trial site, no need to Publish or pay for a subscription to be able to showcase the thing! All you need to do is change a couple of privacy settings to share your free trial site with the world.
Want the full step by step? Let’s get to it!
Step 01: Change your built-in domain name
So, you’ve built your website template in Squarespace, you’re super pleased with the results, and ready to start advertising.
The first step is to get rid of Squarespace’s randomized domain and change it to something a little more template and customer friendly.
To do this, go to Settings:

Then, Domains:

And click on your website’s built-in domain:

Here, you will be able to change your Site ID to customize your built-in domain name:

When you’re done, click on the Rename button:

And Confirm:

Boom! Your template website’s url has now been renamed!
Step 02: Password Protect your site
Go to Settings > Site Availability:

Then, set your site to Password Protected. Here, you’ll be able to set a simple password. Anyone with the password will be able to view the site without you having to subscribe:

Step 03: Create a lock screen
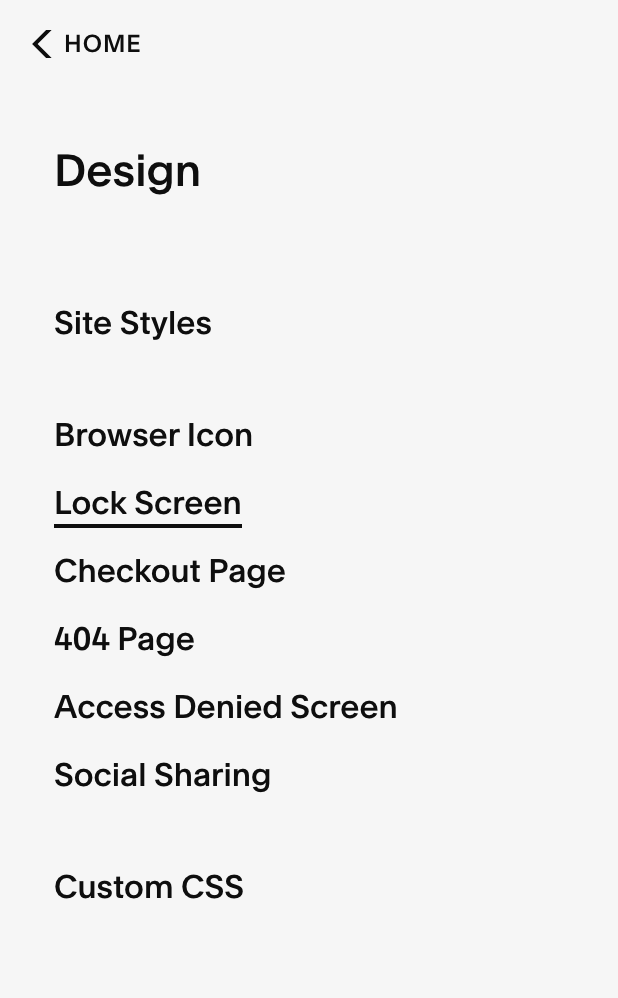
Go to the Design tab:

And select Lock Screen:
Here, you’ll be able to create a lock screen where your potential customers can enter the password you set in the last step and view your template.
We like to keep it straightforward so this is what ours looks like:

Looking a bit too simple for your taste? No worries! You’ll be able to customize your lock screen to make it super on brand!
In the left sidebar menu, click Change Layout to customize the layout of your lock screen:

There are a few layout presets that you can choose from here:

Next, click on Branding & Text to set some instructions on your lock screen:
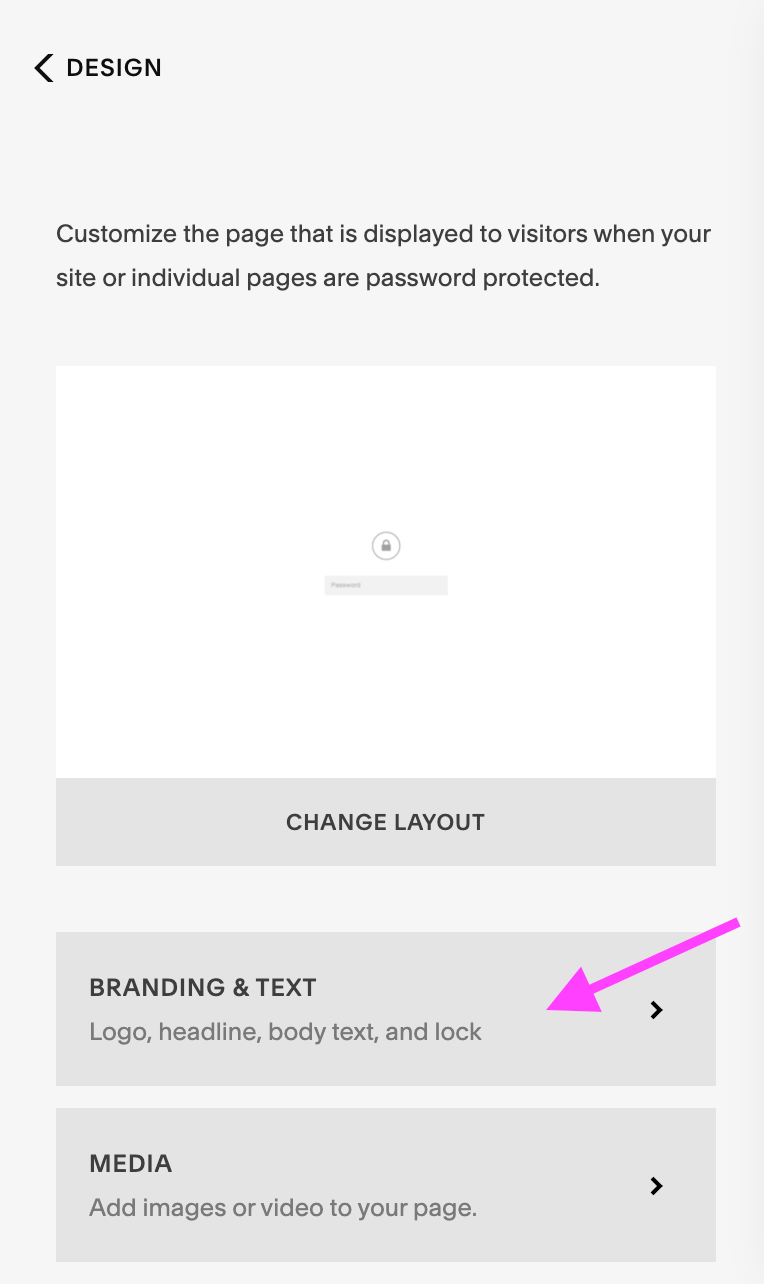
Here, you’ll be able to add your logo (or type out your business name), you’ll also be able to add a headline and body paragraph:

This is where we recommend adding a quick line of instructions for your potential customers to access your template live demo site, including telling them what password they need to enter in order to access it (the one you set earlier!).
Remember to click Save in the top left corner when you’re done!
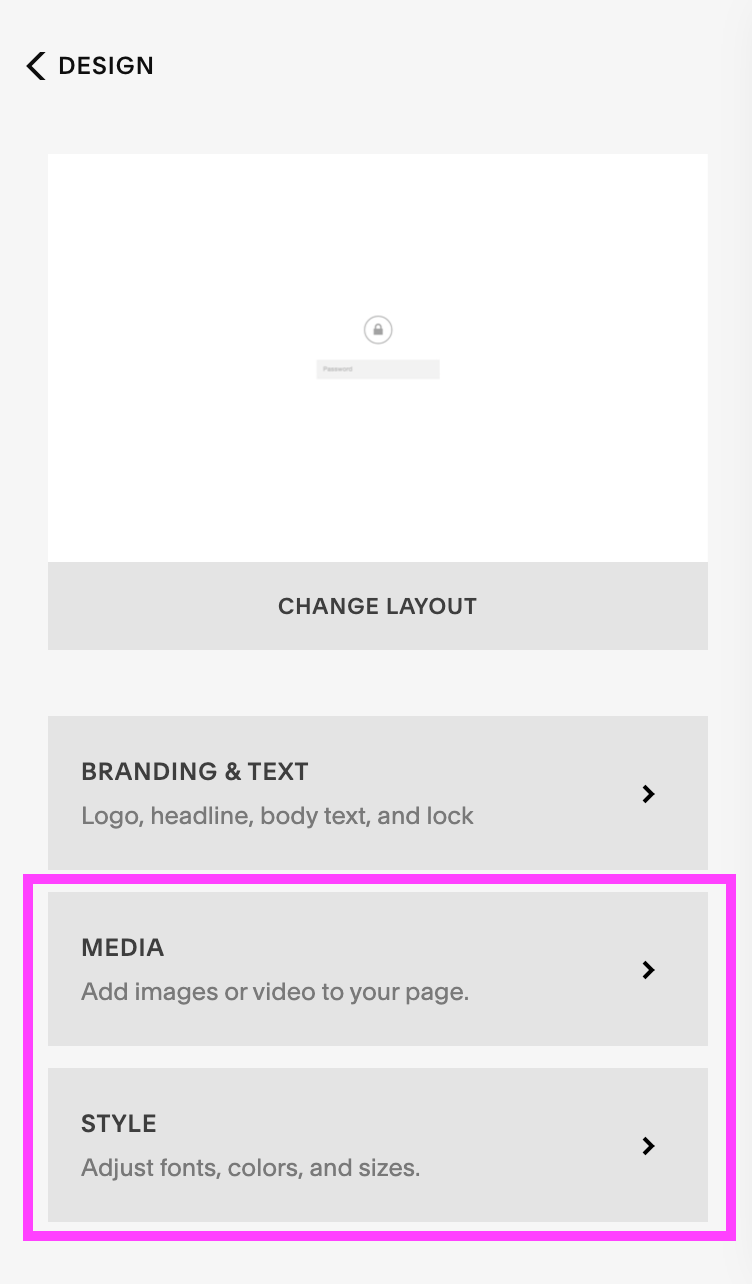
You can keep customizing your lock screen further by adding media (photos or videos), and editing your styles (ie. fonts, colors, etc.) to make it even more on brand!
Step 04: Share the URL
Congrats! Your demo is now “live” and you can start advertising simply by sharing the URL!
Just copy and paste your live demo’s URL you set in Step 01 and link it anywhere on your site.
Tip! Share the URL with a password extension so that your customers can access it straight away. Just add the bolded section to the end of your URL as below:
https://victoria-template-fe.squarespace.com/?password=demo
Remember to change ‘demo’ to whatever you set your password to in Step 02! Easy right?
Squarespace Free Trial and how to become a Circle Member
Now, let’s talk a little about Squarespace’s free trial.
As we’ve established, your demo site will be a free trial site. If you are a Circle Member, this trial will be six months long, as one of the perks of being a Squarespace Circle Member is that any site you create will come with such an extended trial. Obviously, six months is a lot longer than the two week trial period you get as a regular user, so if you’re planning on selling templates and having demo sites, becoming a Circle Member is going to make things a lot easier!
To become a Circle Member, you will need to have built, or be a contributor on at least three active sites. Which actually isn’t too hard to achieve! To find out about the perks and how to join, check out this post.
But what happens when the trial expires?
Although perhaps not so fast, your six months free trial will run out eventually… so what then? Do you have to rebuild your site on another trial site? Do you have to start paying? Do you have to give up your template and run? No, nothing so dramatic, we’ve actually got a couple of super easy solutions to keep extending your free live demo indefinitely!
Option 1: Duplicate your template website to make a copy which will have a brand new six months trial on it.
Now, although it only takes a couple of clicks, the one downside to this option is that the new duplicate will have to have a new built-in domain (see Step 01), and this means you will have to relink your live demo anywhere you linked to it previously.
Although this can be a little bit of a process, having to do it only once every six months is definitely manageable.
Option 2: And the best option in our opinion, is to reach out to the Squarespace customer support team and ask them to extend the trial for you! The support team is pretty damn awesome, and in our experience are always happy to help.
Tip! Keep a calendar of when your trials are due to expire so that you get a reminder to keep on top of it in time! You'll be able to see your template's expiry date in your Squarespace Account Dashboard:

Want more insider tips about building Squarespace Templates?
Want to open your own successful Squarespace Template shop? Our course, Elevate with Templates, is an epic resource for web designers who want to develop, launch and sell Squarespace Templates. Join the waitlist here so you can get notified when we launch next!
You can also sign up for our FREE training while you wait–it’s full of web design tips, advice we’ve learned over the years, and lots of template shop insights (and did we mention it’s free?!)👇
If you liked this post, Pin it to Pinterest! 👇🏻
