

How to create a vertical line in Squarespace (7.0 & 7.1)
Squarespace is great because it provides so many content block options to make designing your website easy and sleek.
We LOVE using the horizontal line block as a divider or to give additional dimension to our websites, however, Squarespace does not provide the option to add a vertical line block.
Vertical lines are a great way to break up information horizontally or as decoration to draw the eye down the page, but how can we create this?


It's actually really simple and takes your site to a whole new level. Ready to get started? Let's go!
Step 1: Create the Vertical Line Using HTML
The first step to creating a vertical line in Squarespace is to add HTML where you want the vertical line to appear on your website.
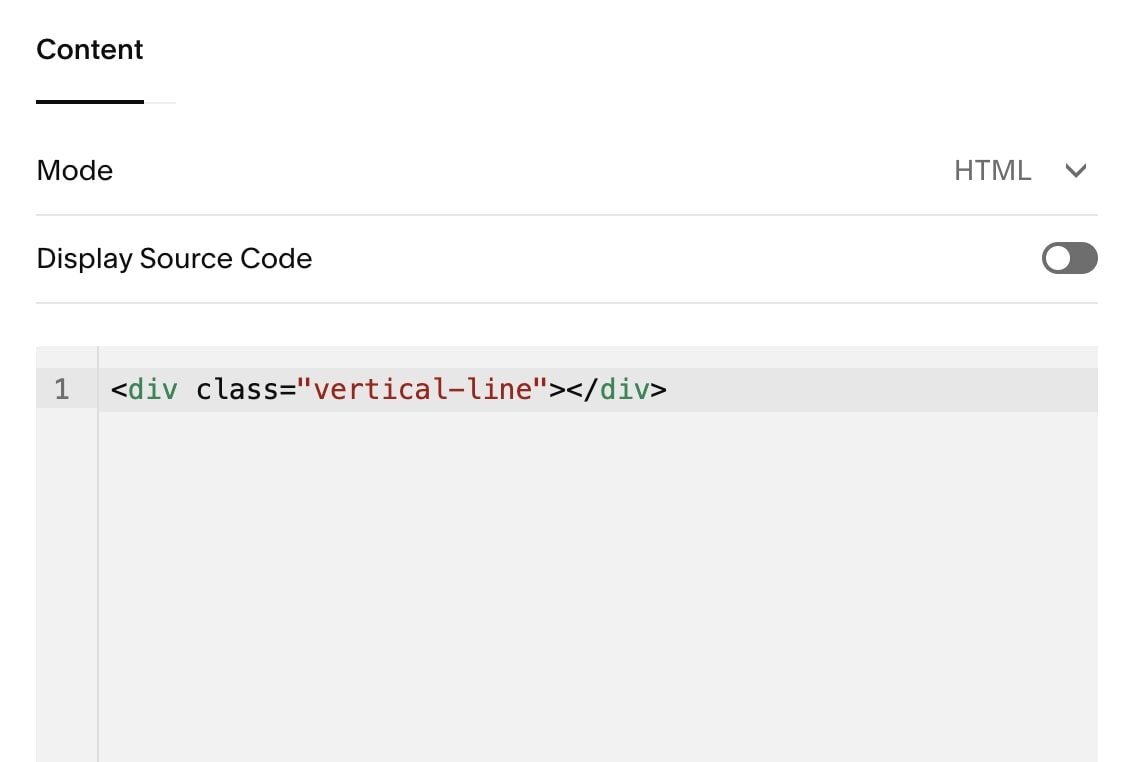
On your Squarespace page, add a Code Block in the spot you would like the vertical line to appear.

In this code block, replace the placeholder text with the following HTML snippet:
<div class="vertical-line"></div>
Note: You can name the div class anything you want. In this example, we've named it "vertical-line" but if you plan to have multiple different vertical lines on your website, you might want to create a unique div class name for each line style.
Don't worry if you don't see anything on the page yet! That's because we need to add Custom CSS to style it.
Step 2: Use CSS to Style the Vertical Line
To style the vertical line, head over to the Custom CSS panel (Design > Custom CSS) and paste the following code to show the vertical line on your website across all device types:
.vertical-line {
  background: #000000;
  width: 1px;
  height: 200px;
  margin: 0 auto;
}
If you would prefer the vertical line only appears on the desktop and tablet version of your website, you can instead copy and paste the following code into the Custom CSS panel:
@media screen and (min-width: 768px) {
  .vertical-line {
  background: #000000;
  width: 1px;
  height: 200px;
  margin: 0 auto;
}
}
Note: If you named the div class something other than "vertical-line" in the HTML code block, you will need to repeat that naming convention in the CSS as well so they speak to one another. For example, if you changed the div class name to "v1" in the code block, you'll need to replace ".vertical-line" with ".v1" in the CSS code block, too!
Let's break down what the property values mean and how you can customize the line to your liking:
background: #000000 ➝ The background property value controls the color of the vertical line. In this example, we've used the HEX code #000000, which makes it appear black. To change the color of the line, you can replace "#000000" with the HEX code of your choice.
width: 1px ➝ The width property value controls the thickness of the vertical line. If you would like a thicker vertical line you can increase this number to the desired width.
height: 100px ➝ The height property value controls the height of the vertical line. You can increase or decrease this value to make it longer or shorter.
margin: 0 auto ➝ The margin property value signifies the space around the elements. This is a standard setting so I recommend leaving this as-is.
Once you're finished updating the CSS code, hit Save and refresh your page to see the vertical line appear.
That's it! Pretty simple right?
In just two short steps you've used both simple HTML and CSS to customize your Squarespace site.
Feel free to have fun with the CSS and play around with different customizations! And make sure to check out some of our other quick code tricks for customizing your Squarespace site:
How to customize your Squarespace cookie banner design
How to animate your links on hover in Squarespace 7.0 & 7.1
How to create a sticky header nav in Squarespace
How to add a background color to a text block in Squarespace
6 fun code snippets for your Squarespace web design
I hope you enjoyed this post and learned a bit about email marketing and where to start. Good luck!
If you liked this post, Pin it to Pinterest! 👇🏻
